 Plantico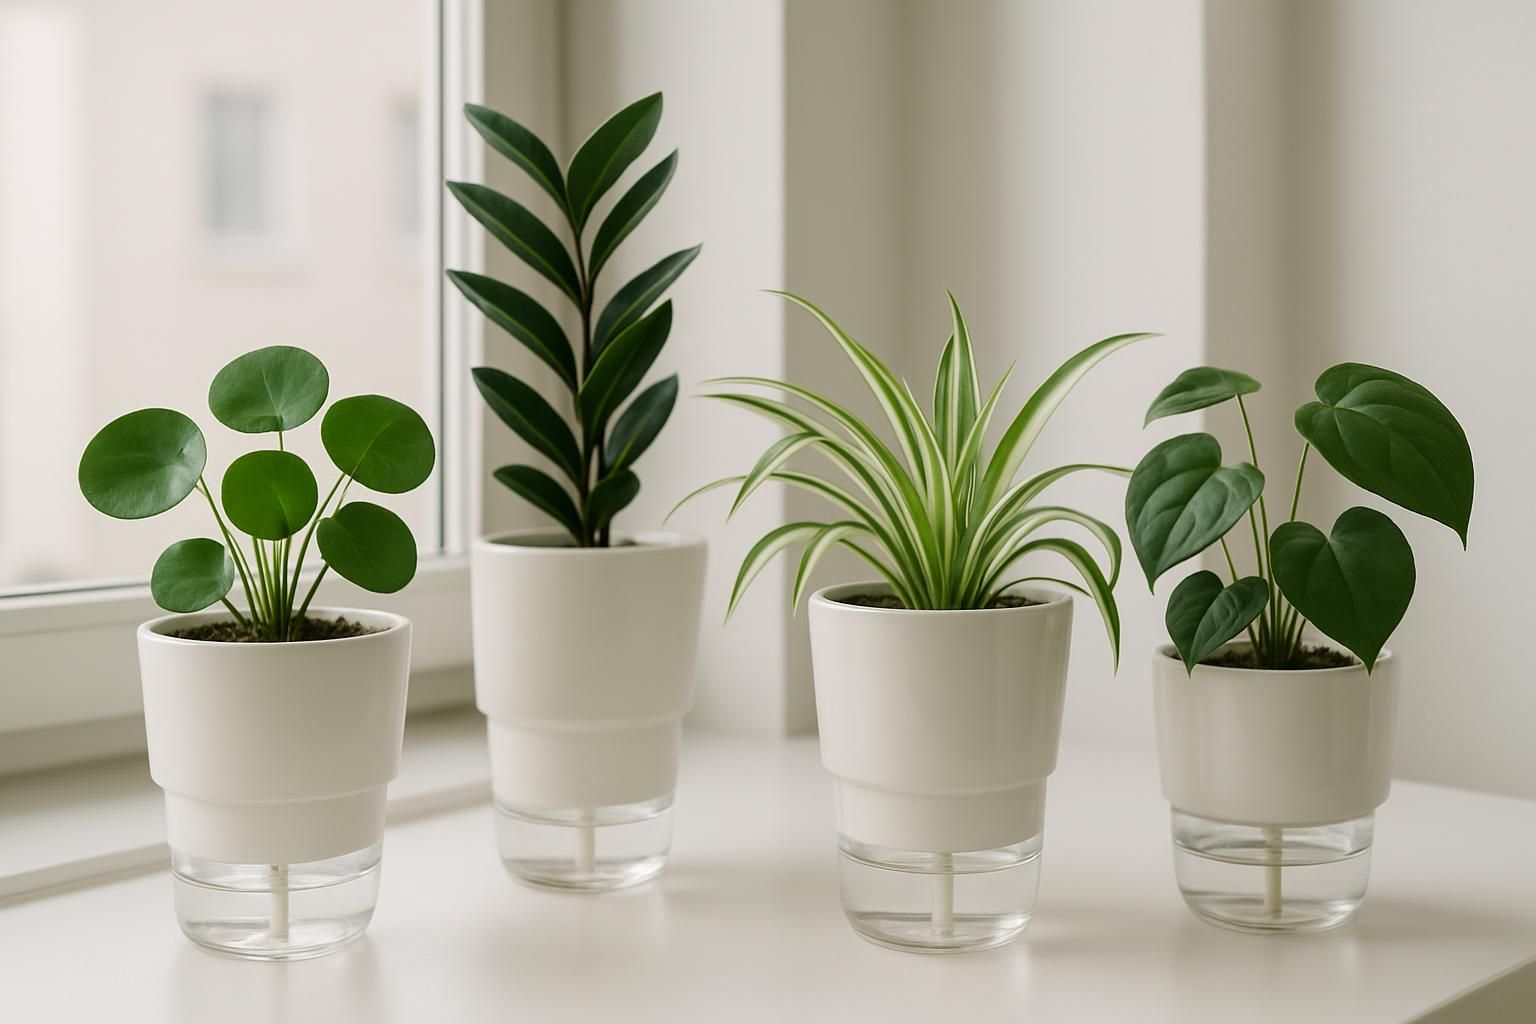
Wick watering is a simple, low-tech way to give houseplants steady moisture without pumps or electronics. A strand of synthetic fiber runs from a water reservoir into your potting mix. Capillary action moves water upward as the soil dries, so plants sip what they need. Done right, it keeps thirsty species happy, stretches time between refills, and reduces the spikes of over- and underwatering that stress plants indoors.
How Wick Watering Works
Think of a wick as a narrow bridge between the reservoir and the root zone. Water climbs the wick because of capillary action: liquid clings to the tiny fibers and crawls upward. As your mix dries, it pulls more from the wick; when the mix is evenly moist, flow slows. This on-demand behavior is what makes wicks effective for steady moisture lovers like Calathea, Fittonia, African violet, and many aroids.
Flow depends on four things you control:
- Wick material and thickness: Smooth, synthetic fibers (nylon, acrylic) resist rot and move water predictably. Thicker wicks move more water.
- Reservoir height: The deeper the waterline below your pot base, the slower the wicking. Raising the reservoir speeds it up.
- Soil texture: A fine, peat- or coir-based mix wicks faster than a chunky, airy aroid mix. More perlite or bark slows flow.
- Container type: Plastic or glazed pots hold moisture better. Unglazed clay breathes and can offset some of the wick’s effect by drying the sides.
Wicks don’t force-feed. If a setup is balanced, the plant and medium regulate intake. Problems start when flow outruns evaporation and use (leading to soggy roots), or when the wick can’t keep up (leaving dry pockets). The goal is to tune those four variables for your plant and room conditions.
What You Need: Materials and Why They Matter
You can assemble a reliable wick system with inexpensive parts. Choose durable, rot-resistant materials and size the wick to the plant and pot.
- Wick: 3–6 mm braided nylon cord, polyester macramé cord, or acrylic yarn. Avoid cotton; it degrades and can stagnate.
- Pot: Plastic nursery pot or glazed ceramic with a drainage hole. For clay, start with a slower wick or lower reservoir to avoid over-wet roots.
- Reservoir: A jar, bottle, or covered bin placed below or beside the pot. Opaque keeps algae down; a small sight window helps you gauge level.
- Potting mix: Match to species. For wick-friendly mixes, include a moisture-retentive base (peat or coir) plus porosity (perlite/pumice) and structure (fine bark).
- Optional fittings: Rubber grommet for a tidy exit hole, a clip to secure the wick under the pot, and a cover to minimize evaporation and algae.
If you’re not sure what species you’re growing, Plantico can help you identify a plant from a photo. Knowing whether it prefers steady moisture or dries out between waterings will guide how aggressively you wick.

Step-by-Step: Set Up a Wick System
- Cut and prep the wick. For a 12–15 cm pot, start with 25–30 cm of 4–5 mm nylon cord. Rinse it to remove factory residues.
- Thread the pot. Feed the wick up through the drainage hole so 8–10 cm lies inside the pot in a loose S-shape. Avoid a single tight loop that channels water to one spot.
- Fill the pot. Add mix to hold the wick in place as you plant. For aroids (Monstera, Philodendron, Anthurium), use a chunky mix and keep the wick nearer the outer third of the pot so the core doesn’t get waterlogged. For African violets, seat the wick under the root ball in a fine-textured mix.
- Seat the pot on the reservoir. Place the pot on a grate or saucer above your reservoir so the wick dangles freely into the water. Start with the waterline 1–2 cm below the pot’s base. Raising the waterline increases flow; lowering it slows flow.
- Prime and observe. Water the pot from the top to evenly moisten the mix and prime the wick. Refill the reservoir. Over the next 24–48 hours, check that the top few centimeters of mix stay slightly damp (for moisture lovers) or dry back modestly (for aroids and general foliage).
- Adjust. If the surface is staying soggy, lower the waterline, switch to a thinner wick, or increase perlite. If the surface dries hard while the reservoir remains full, raise the waterline slightly or use a thicker wick.
Tip: Use a small cover on the reservoir with a notch for the wick. It slows algae and evaporation, so the plant—not the room—uses most of the water.
Dial In Flow for Different Plants and Mixes
Match wick capacity to the plant’s natural moisture preference and the texture of your medium.
- Moisture lovers (Calathea, Fittonia, Maidenhair fern): Fine-textured mix (coir or peat with added perlite). Medium-thickness wick. Keep the reservoir waterline close to the pot base so the top 2–3 cm of soil stays faintly damp, not wet.
- Aroids (Monstera, Anthurium, Philodendron): Chunky mix (bark, perlite, a little coir). Thinner wick or lower waterline to prevent a constantly wet core. Let the top 2–3 cm of mix dry slightly before refilling if the reservoir runs out.
- African violets and Gesneriads: Wick-friendly by tradition. Use a stable, fine mix and run the wick under the root ball. Keep the reservoir topped so the crown never sits in wet media.
- Pothos and similar vining foliage: Moderate flow works well. If leaves are thin and droop between refills, increase flow slightly; if new leaves are pale and soft, decrease.
- Succulents and snake plant (Sansevieria): Generally not wick candidates. If you experiment, use a very thin wick, a gritty mix, and a low waterline so the mix dries between sips. Watch for swelling, soft leaves, or crown rot and abort if seen.
Substrates like LECA can be wick-assisted in cachepots, but the wick should contact only the lower layer. Keep the top layer dry for oxygen. Flush periodically to prevent salt buildup.
Water, Nutrients, and Maintenance
Reservoir water stays in contact with media for longer than a normal watering, so keep it clean and mild.
- Fertilizer: Use a dilute, balanced liquid feed in the reservoir occasionally, then rotate with plain water. Flushing the pot with plain water monthly helps prevent salt accumulation.
- Algae and biofilm: Use an opaque reservoir or cover; rinse and refresh periodically. If slime appears on the wick, replace it and sanitize the reservoir.
- Water quality: If your tap water leaves crust on pots or causes leaf tip burn, consider filtered or rainwater. This is especially helpful for Calathea and other sensitive plants.
- Seasonal tuning: Lower the waterline or use a thinner wick in winter when light and growth slow. Raise flow in brighter, warmer months.
- Safety: Keep nutrient reservoirs out of reach of pets and children. If a pet drinks fertilizer solution, contact a vet for advice.
Set refill and flush reminders in Plantico so you don’t forget routine maintenance. Small, consistent adjustments keep a wick system stable for the long run.
Troubleshooting: Read What the Plant Is Telling You
Because wick systems run continuously, small mismatches can show up in the leaves. Use the cues below and adjust one variable at a time.
- Soggy surface and fungus gnats: Lower the reservoir, thin the wick, or add more perlite. Allow the top 2–3 cm to dry before refilling. If you’re still unsure about timing, here’s how to think about how often to water houseplants with different mixes and pots.
- Yellowing lower leaves on moisture lovers: Could be chronic wetness or nutrient imbalance. Reduce flow slightly and flush with plain water. For pattern clues and other causes, see why leaves turn yellow.
- Brown leaf edges or tips on Calathea: Often mineral sensitivity or uneven moisture. Try filtered water in the reservoir, ensure steady but not saturated moisture, and flush monthly.
- New growth pale and soft: Likely too much water relative to light. Lower the waterline and improve light.
- Top dries while reservoir stays full: Increase wick thickness or raise the reservoir slightly. Make sure the wick touches moist media, not an air gap.
- Salt crust on soil surface: Pause fertilizer, flush thoroughly from the top, and refresh the reservoir with plain water.
Leaf spots or blotches that don’t track with moisture can be a separate issue. If you suspect disease, compare symptoms with our guide to why leaves turn yellow or other resources, and adjust care gradually rather than all at once.
When Wick Watering Isn’t the Best Fit
Some scenarios fight the physics or the plant’s preferences:
- Very large pots: A single wick may not distribute moisture evenly. Multiple wicks at the perimeter can help, but consider bottom-watering trays instead.
- Extremely airy mixes: If your mix is mostly bark and chunky perlite, wicking may never saturate enough of the profile. Hand watering lets you target the core while keeping air in the gaps.
- Dry-down specialists: Cacti and many succulents prefer pronounced dry periods. Even a thin wick can keep them too damp in cool, low-light rooms.
- Cold rooms: Cooler media hold moisture longer. If your space is cool and dim, wick systems are more likely to overdo it.
It’s fine to run a hybrid approach: use wick watering for thirsty species and hand-water drought-tolerant plants. If you share a shelf with mixed needs, group similar plants on the same reservoir height so tuning is easier.
Conclusion
A well-built wick system is a quiet upgrade to indoor care: plants get steady moisture, you get more predictable routines, and there’s nothing to break or charge. Start conservatively with a thin synthetic wick, a modest waterline, and a mix that matches your plant’s needs. Observe foliage and soil feel over a week, then adjust one variable at a time. If you’re setting up your first system, our guide to how often to water houseplants can help you sanity-check moisture targets, and if leaves start sending mixed signals, review patterns in why leaves turn yellow. Once dialed in, wick watering can keep African violets blooming, Calathea calm, and everyday foliage plants growing evenly with fewer surprises.