 Plantico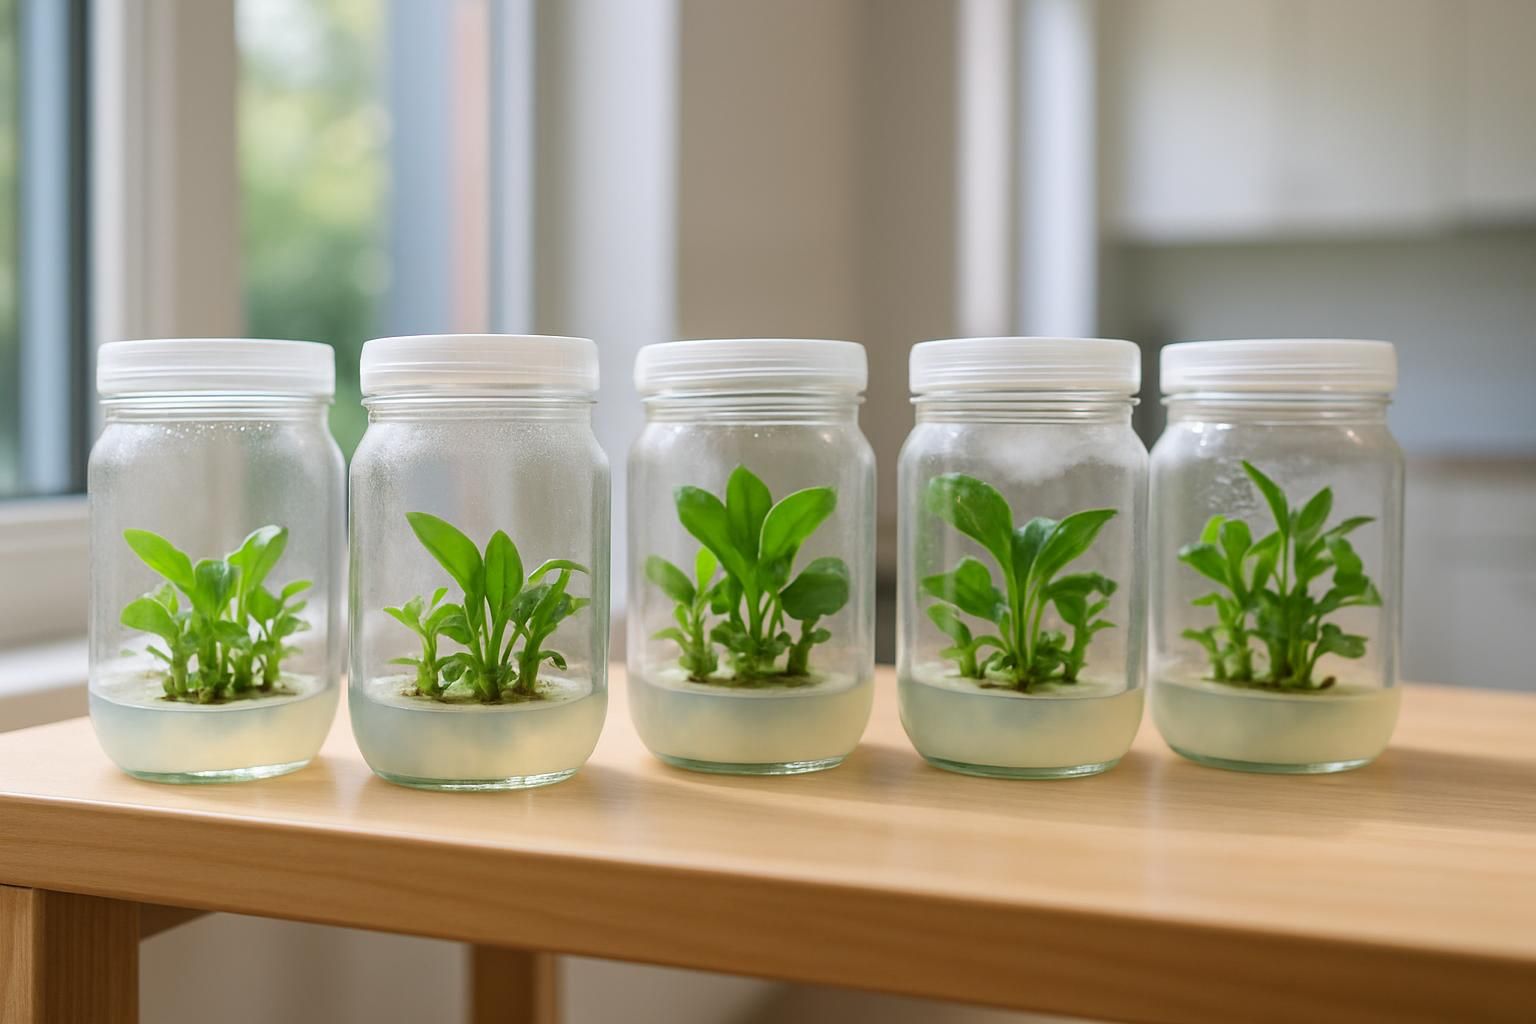
Plant tissue culture, once locked behind lab doors, is now possible on a kitchen table with a few careful upgrades. If you want more than a single cutting, tissue culture can multiply a healthy Monstera deliciosa, Philodendron, Alocasia, or snake plant into a tray of uniform, pest-free plantlets. The process demands patience and cleanliness, but it rewards you with predictable results and a steady pipeline of new plants.
What Is Plant Tissue Culture (and Why Try It)?
Tissue culture is a method of growing tiny pieces of a plant (called explants) on a sterile, gel-like nutrient medium. Under clean conditions with the right nutrients and plant hormones, those pieces form new shoots and roots. Unlike water or soil propagation, tissue culture is designed to be consistent and scalable. You can start with a small, disease-free piece of stem or leaf and end up with dozens of identical clones.
For houseplant owners, the advantages are compelling:
- Scale: Turn one clean donor plant into many uniform offspring over a few cycles.
- Clean starts: Begin with sterile media to avoid hitchhiking pests and many common pathogens.
- Space efficiency: Jars take far less room than trays of cuttings.
- Control: Light, nutrients, and humidity are precisely managed.
It is not instant. You will spend time on sterilization, and you will troubleshoot contamination. But once you dial in your setup, the workflow becomes routine.
What You Need to Get Started (Budget to Pro)
You do not need a lab to start. Build your kit gradually and upgrade where it adds the most stability.
- Work area: A clean table you can wipe down with alcohol. Avoid drafts during transfers.
- Still-air box (SAB): A clear storage bin turned on its side makes a simple draft-free workspace. Cut two arm holes and work with slow, deliberate movements.
- Sterilization basics: 70% isopropyl alcohol for surfaces and tools, household bleach for surface-sterilizing plant material, and sterile water or boiled, cooled water for rinsing.
- Heat and pressure: A pressure cooker or electric canner to sterilize media and jars. Follow the manufacturer’s canning cycle guidance.
- Containers: Glass baby-food jars, canning jars, or culture vessels with tight lids. Venting with a small breathable patch or filter disc helps gas exchange while keeping contaminants out.
- Tools: Scalpel or razor blades, fine forceps, flame source to re-sterilize tips, nitrile gloves, face mask, and paper towels.
- Media: A pre-mixed tissue culture medium kit designed for houseplants or ornamentals. Look for options that include gelling agent and clear instructions for mixing and pH. Ready-made refill packs simplify consistency.
- Light: A small LED grow light or bright, indirect window light. Aim for steady, moderate brightness and a 12–14 hour daily photoperiod on a timer.
- Donor plants: Healthy, actively growing plants you know by species or cultivar. If you are unsure, you can identify a plant from a photo before you propagate it, which helps you follow species-specific handling tips.
Optional but helpful upgrades include a laminar-flow hood (for extremely clean air during transfers) and a pH pen if you decide to mix media from scratch.

Step-by-Step: From Explant to Baby Plantlets
Each plant family responds a little differently, but the home workflow follows a familiar pattern. Work slowly and keep your movements tidy to reduce airborne contamination.
- Prepare the media and jars: Mix your medium per the kit label. Pour a shallow layer into jars, cap loosely, and sterilize using your pressure cooker’s canning cycle. Let them cool and set.
- Choose clean source material: Take small, actively growing pieces. For Monstera and Philodendron, a nodal segment works well. For snake plant (Dracaena trifasciata), a young, firm leaf section can be used.
- Surface-sterilize the explant: Rinse off debris, then dip in a mild bleach solution per your kit or protocol. A drop of dish soap can help wet waxy leaves. Rinse several times with sterile or boiled, cooled water to remove all traces of bleach.
- Set up your SAB: Wipe down the inside with alcohol, place tools and cooled jars inside, and let the air settle. Wear gloves and a mask.
- Trim and place: Flame-sterilize your scalpel tip, cool it briefly, then trim away damaged tissue. Place the clean interior piece onto the medium so it makes good contact without submerging.
- Seal and label: Close the jars firmly. Label with species, date, and media formula if you are testing variants.
- Incubate under light: Put jars under a gentle LED on a 12–14 hour cycle. Room temperature around 20–24°C suits most common houseplants. Avoid direct sun heating the jars.
- Wait and observe: Over 2–6 weeks, look for callus or small shoots. Discard any jars that show cloudy medium, fuzzy growth, or off smells, as those indicate contamination.
- Multiply and root: Once you have small shoots, you can transfer them to fresh, hormone-free medium to encourage stronger stems and roots. Divide clusters into smaller pieces during transfer to increase your numbers.
Expect your first run to have some losses. Keep notes so you can repeat what works and drop what does not.
Sterility Strategies That Actually Work at Home
Sterility is the difference between success and throwing out cloudy jars. You will never remove every microorganism, but you can reduce the load enough that your plant wins the race.
- Control air movement: Work in a still-air box. Turn off fans and HVAC vents nearby during transfers.
- Flame between cuts: Briefly pass the scalpel tip through a flame, then cool it before touching plant tissue again.
- Clean surfaces: Wipe work surfaces, gloves, jar lids, and the outside of explants with alcohol before moving them inside the SAB.
- Plan your motions: Open the jar, make the placement, and re-cap without waving tools around. Slow is smooth.
- Use fresh media: Old or repeatedly heated media breaks down and invites problems. Make small batches you can use within a session.
If contamination appears as white fuzz, colored spots in the gel, or a sour odor, discard the jar. Do not try to save it. Review where airborne spores or dirty tools could have entered, tighten your process, and try again.
Light, Temperature, and When to Change Media
Plantlets grow best with consistent, moderate light and steady warmth. Bright, diffuse light is safer than intense beams. An inexpensive timer keeps conditions stable day to day.
- Light: A small LED panel positioned high enough to avoid heating the jars works well. Avoid dark corners; too little light can cause weak, pale shoots.
- Temperature: Most houseplants respond well around 20–24°C. Cooler rooms slow growth; excessive heat can liquefy media and stress tissue.
- Media refresh: Transfer to fresh, clean medium when you see new shoots crowding the jar, the gel shrinking, or any hint of browning around the tissue. Moving clean shoots to hormone-free medium often helps them thicken and root.
Resist the urge to open jars frequently. Each opening is a chance for contamination. Observe from the outside and schedule transfers intentionally.
Troubleshooting: Contamination, Browning, and Glassy Growth
Most issues have visible patterns. Knowing what you are seeing saves time and materials.
Cloudy gel, fuzz, or colored spots
This is contamination. Common causes include insufficient surface sterilization of the explant, touching non-sterile surfaces, or drafts during transfer. Tighten your sterilization steps and consider reducing the size of the initial explant to expose more clean interior tissue. If you are unsure whether you are dealing with disease on the donor plant versus lab contamination, you can use Plantico’s guide to identify plant diseases on the mother plant before you harvest new explants.
Tissue turns brown or black near the cut
Some species release phenolic compounds that oxidize and darken. Work quickly to minimize exposure, and transfer to fresh medium if darkening spreads. Reducing mechanical damage while trimming and rinsing thoroughly after surface sterilization also helps.
Glassy, waterlogged shoots (hyperhydricity)
Plantlets look translucent and brittle when humidity is extreme or the gas exchange is too limited. Improve ventilation slightly with a breathable lid patch, increase the distance to the light to reduce heat, and move affected shoots to a firmer, hormone-free medium to recover.
Slow or no growth
Check the basics: Is the room too cool? Is the light too dim? Old medium can also stall growth. For very slow species, patience matters. Keeping explants small and moving clean shoots onto fresh, simple medium can restart progress.
After you transplant tissue-cultured plantlets to potting mix, keep an eye on leaf quality. If you notice speckling or lesions on new leaves during acclimation, this is usually an environmental swing rather than a lab infection. Our guide on brown spots on leaves can help you separate normal hardening-off blemishes from emerging problems.
Acclimating Plantlets to Potting Mix
Plantlets raised in sealed jars are not ready for dry room air. They need a gradual transition to avoid collapse.
- Rinse off the gel: Lukewarm, clean water removes media that can feed mold in potting mix. Handle gently to protect fine roots.
- Use a sterile, airy mix: A simple blend of fine perlite and coco coir or peat gives roots oxygen and stability. Pre-moisten so it is evenly damp but not soggy.
- Dome and vent: Place a clear cover over the pot to maintain high humidity. Over 7–14 days, open vents a bit more each day to toughen the leaves.
- Light and warmth: Bright, indirect light and steady room temperature work best. Avoid direct sun until plants have thicker cuticles and sturdier stems.
- Watch for fungus gnats: Keep the surface on the dry side between waterings. Sticky traps help you catch early arrivals.
Expect a few lower leaves to yellow or shed during hardening off. New growth should look compact and steadily larger. If the plant stalls or declines, step back through watering, light, and humidity. Plantico can also help you identify a plant from a photo to confirm species-specific care once your clones are potted.
Conclusion
Home tissue culture opens a practical path to multiplying your favorite houseplants with precision. Start simple: clean work habits, a basic still-air box, pre-mixed medium, and a small LED on a timer. Practice surface sterilization and measured movements until contamination rates drop. As your confidence grows, you can fine-tune media choices and transfer timing to suit each species in your collection.
Keep notes, move deliberately, and be patient. The first time you lift a jar filled with crisp, green plantlets ready for potting, you will have a repeatable method to grow your collection sustainably, one clean clone at a time.