 Plantico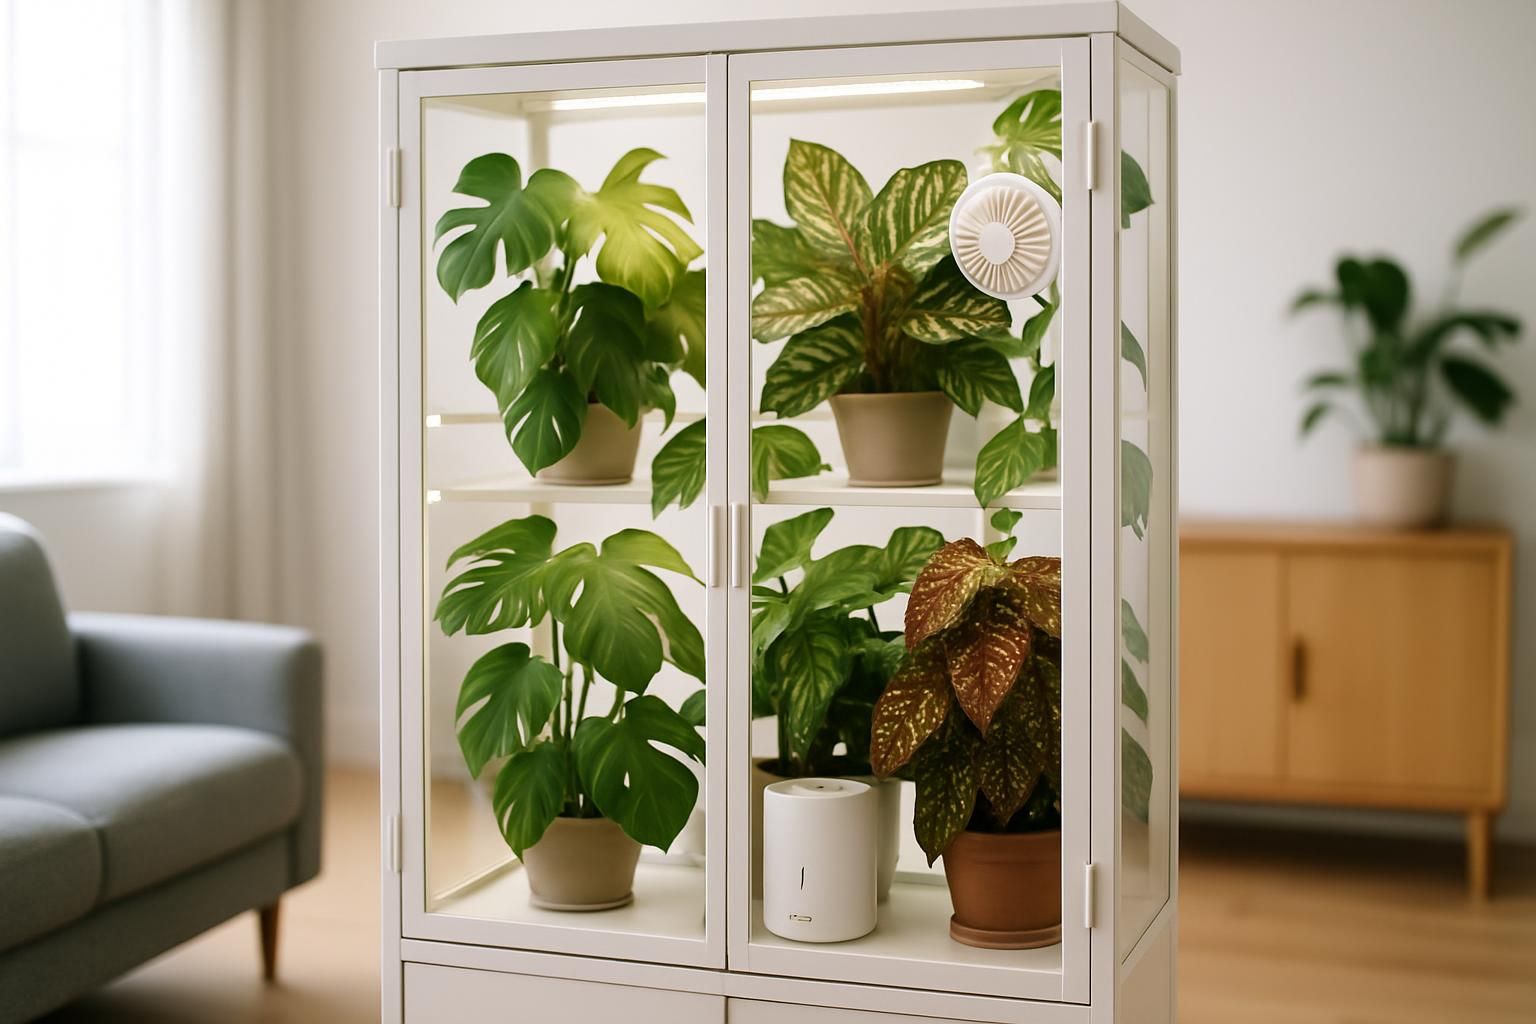
A smart plant cabinet is a compact, climate-controlled space that lets you grow humidity-loving houseplants with consistent light, airflow, and temperature. If your Calatheas crisp at the edges, your anthuriums stall in winter, or your cuttings sulk on a windowsill, a cabinet can give them the steady conditions they need. Here is a practical, step-by-step build that fits in most apartments and won’t turn your living room into a jungle of cords.
What Is a Smart Plant Cabinet?
Think of it as a mini indoor greenhouse built from a glass display cabinet or a metal storage unit with clear doors. Inside, you add LED grow lights, small circulation fans, and a humidifier controlled by a plug-in humidistat. A thermometer-hygrometer (ideally with data logging) tracks your climate so you can adjust quickly. The sealed space raises humidity efficiently, keeps pests localized, and lets you dial in light for growth without blasting your whole room.
This setup is ideal for:
- Aroids (Philodendron, Anthurium, Monstera adansonii) that appreciate stable warmth and moderate to high humidity.
- Calatheas/Goeppertias and Marantas that dislike dry air and fluctuating conditions.
- Ferns, jewel orchids, many begonias, and propagations that root faster in gentle, humid air.
Planning: Choose the Right Cabinet and Plants
Pick a cabinet that is sturdy, ventable, and safe for electrical gear. A common sweet spot is 60–80 cm wide, 30–40 cm deep, and 120–160 cm tall. Glass sides make light distribution easy and help you spot issues fast. Ensure the doors close well; small gaps are fine and help fresh air exchange. Avoid untreated wood interiors if you plan to run high humidity for long periods.
Plants to prioritize: tender aroids, humidity-loving begonias, ferns, carnivorous plants that enjoy bright light and moist air, and cuttings in LECA or sphagnum. Plants that prefer drier air (e.g., succulents) or very strong light usually do better outside the cabinet.
If you inherited a mystery plant, confirm it really wants this treatment before you commit space. You can identify a plant from a photo with Plantico so you match the cabinet’s climate to the species.

The Hardware: Lights, Fans, Humidity, and Control
You can assemble a reliable system from simple, off-the-shelf parts. Aim for components you can mount cleanly and service easily.
- LED grow lights: Slim bar lights or a low-profile panel sized to your shelves. Target moderate intensity: for most aroids and begonias, 100–250 µmol/m²/s PPFD at plant height for 12–14 hours works well. If you do not have a PAR meter, choose lights rated for 20–40 W per shelf and start high, then lower them as needed.
- Circulation fans: Two to four 40–80 mm USB fans per tall cabinet. Place one low and one high on opposite sides to keep air moving gently across leaves and the humidifier outlet. Constant, soft airflow helps prevent fungal spots and edema.
- Humidifier: A compact ultrasonic unit (external reservoir or a small internal unit). Run it through a plug-in humidistat with a short humidity deadband so RH does not swing wildly. A water tray with LECA can add passive humidity between cycles.
- Sensors and control: A digital thermometer-hygrometer with min/max memory or logging. A smart plug or basic outlet timer for lights. A separate humidistat for the humidifier. Optional: an inkbird-style thermostat for a small heat mat if your room is cool in winter.
- Mounting and sealing: Magnetic strips, zip ties, adhesive cable clips, and weatherstripping to reduce rattles and light leaks. Use stick-on wire channels to route cables cleanly along the frame.
- Power safety: A surge-protected power strip located outside or at the top of the cabinet. Drip loops on every cable. If possible, use a GFCI outlet. Keep all plugs and controllers away from humidifier mist.
Step-by-Step Build Guide
Set aside a couple of hours. Measure twice, stick once.
- Prep the cabinet: Clean the interior and shelves. Add thin weatherstripping along the door edge if the gap is wide. Plan cable routes before mounting anything.
- Mount the lights: Attach LED bars under each shelf or suspend a panel near the top. Keep 20–40 cm distance from plant tops to start. Plug lights into a timer set for 12 hours on. You can extend to 14 hours in winter.
- Add airflow: Mount one fan high on the back left, one low on the front right. Angle them so the airstreams cross without blasting a single leaf. Run them on low 24/7.
- Place the humidifier: Put it low, away from electrical gear and not directly under lights. If internal space is tight, park it just outside with a mist tube feeding in through a small hole or door gap. Connect to a humidistat and set an initial target of 65% RH.
- Install sensors: Place a thermometer-hygrometer at mid-height, shaded from direct light. If you have a second sensor, put it on the top shelf to monitor the warmest spot.
- Route and secure cables: Run cords along corners using clips. Create a drip loop on each line before it reaches the power strip. Keep the strip high and dry.
- Test run (empty): Close the doors and run lights, fans, and humidifier for 24 hours. Record temperature and RH highs and lows. Adjust the humidistat and fan angles until the climate is stable.
- Load plants gradually: Start with a few pots. Watch how RH and temperature change with foliage mass, then add more. Avoid crowding leaves against glass where condensation forms.
Dialing In Climate and Light Targets
Cabinets heat up from lights, so climate is a balance of placement, cycle length, and airflow. Use your sensor data and plant feedback to fine-tune.
- Temperature: Most tropical houseplants are comfortable at 20–26°C in the day and 18–22°C at night. If temps exceed 28°C with lights on, raise the lights, reduce the photoperiod by an hour, or open doors briefly to vent heat.
- Humidity: Start at 60–70% RH. Sensitive foliage (Calathea, some ferns, jewel orchids) often look best at 65–75%. Aroids tolerate 55–70%. Keep consistent airflow to avoid stagnant, saturated air pockets.
- Light: For aroids and begonias, aim for medium intensity: roughly 100–250 µmol/m²/s at the leaf surface. Calatheas generally prefer the low end of that range. Without a PAR meter, use plant response: compact, rich color and steady new leaves signal enough light; washed-out leaves or crispy edges can mean too much.
- Photoperiod: 12 hours is a safe default. Extend to 13–14 hours in winter to maintain growth if temperatures are stable.
- Fresh air: Briefly open the doors daily or leave a small passive vent to exchange air. This limits CO₂ depletion and helps keep fungal pressure down.
If leaves start yellowing or growth stalls while you adjust, review basics like light and watering. This guide on why leaves turn yellow can help you narrow it down.
Care Inside the Cabinet: Water, Feeding, and Hygiene
High humidity changes how media dry and how nutrients move. Small tweaks go a long way.
- Watering in soil: Because evaporation slows in humid air, check moisture with your finger and water when the top 2–3 cm of soil is dry. Use well-draining mix (e.g., potting soil with chunky bark and perlite) so roots get air.
- Semi-hydro: Many growers use LECA or pon in cabinets. Keep a shallow reservoir and flush with clean water every 2–4 weeks to prevent salt buildup. Start with mild fertilizer and increase only if growth is pale or slow.
- Fertilizing: In active growth, feed at quarter to half strength every 2–4 waterings. In low winter light, reduce frequency. Watch for leaf tip burn as a sign to back off or flush.
- Leaf care: Wipe dust from leaves monthly to improve light capture. Avoid frequent misting; it adds surface moisture without raising ambient RH for long and can spot sensitive foliage.
- Cleaning: Empty and sanitize the humidifier weekly to prevent biofilm. Wipe condensation from glass. Remove dead leaves promptly to reduce fungal risk.
- Pest control: Check undersides of leaves during waterings. Sticky traps at the base help you catch fungus gnats early. If you notice tan or dark lesions, compare with the guide on brown spots on leaves to decide whether it is cultural stress or a pathogen.
Some species-specific notes:
- Aroids (Philodendron, Anthurium): Moderate light, steady 60–70% RH, and slightly drier roots between waterings. Too much humidity without airflow can cause edema or bacterial spots.
- Calathea/Goeppertia: Gentle light, 65–75% RH, and evenly moist, airy soil. They flag quickly if lights are too strong or if roots sit cold and wet.
- Begonias: Bright but indirect light, 60–70% RH. Keep leaves dry; water at soil level and ensure continuous airflow to prevent mildew.
- Ferns: Consistently moist substrate and soft light. They benefit from higher RH but still need movement to keep fronds clean and healthy.
Conclusion
A smart plant cabinet compresses the advantages of a greenhouse into a tidy, living-room-friendly footprint. With a simple set of lights, fans, and a humidistat, you can create stable conditions that help humidity-loving houseplants grow evenly year-round. Start with a clean cabinet, mount your gear securely, test the climate before adding plants, and then fine-tune light, humidity, and watering based on what your leaves are telling you. Keep the electrical hardware dry and high, maintain good airflow, and clean regularly. If you stay consistent, your fussy plants stop fussing and start producing new growth like clockwork.