 Plantico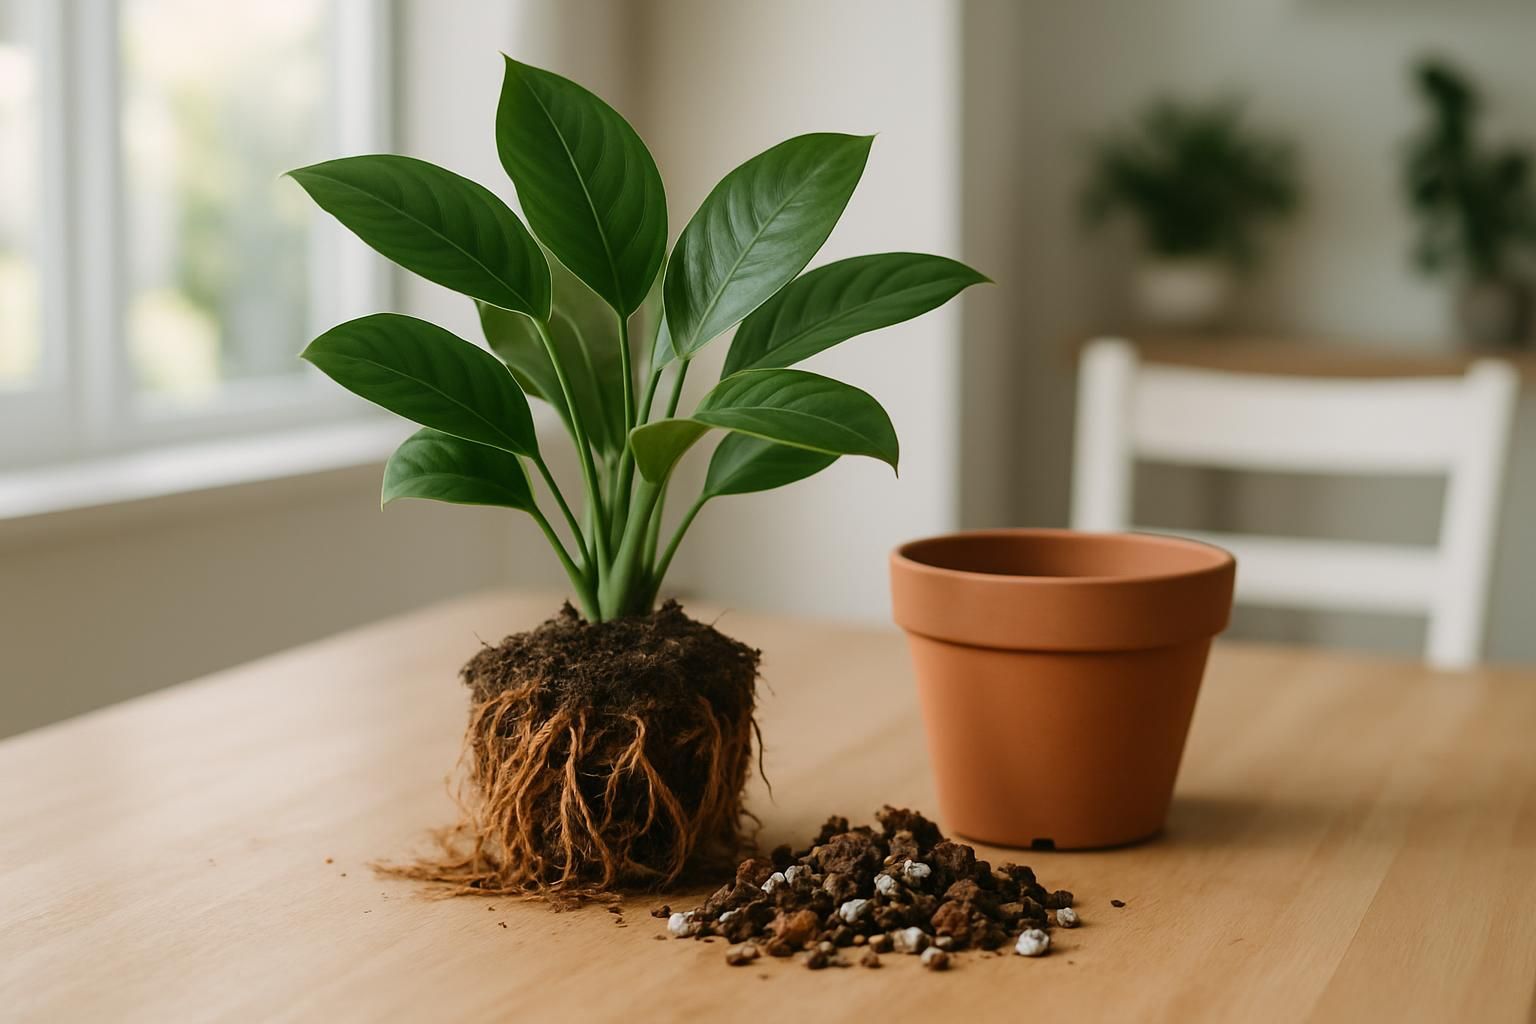
Root rot is one of the fastest ways a houseplant declines: leaves yellow and wilt, soil smells sour, and the plant struggles even when the pot is wet. The good news is you can often save it if you act quickly. This guide walks you through confirming it’s root rot, removing diseased roots, repotting into a better mix, and setting up care so it doesn’t come back.
Confirm It’s Root Rot, Not Something Else
Before you treat, make sure root rot is the real issue. The symptoms can look like other problems, so take a minute to check.
- Leaves: Lower leaves yellow first, then drop. New growth may be small or distorted. Wilting can happen even when the soil is wet.
- Soil: Stays wet for days, smells sour or swampy, or has algae on top. The pot may feel heavy long after watering.
- Roots: Slide the plant out gently. Healthy roots are firm and white to tan. Rotted roots are brown to black, mushy, and may slough off their outer layer.
Underwatering typically shows crisp, dry leaves and very dry soil. A nutrient issue rarely makes roots mushy. If you see spots or fuzzy growth on leaves, cross-check symptoms to identify plant diseases that might be present alongside rot.
If you’re unsure what plant you have, that matters—watering needs vary by species. You can identify a plant from a photo to tailor the mix and watering to its growth habit.
Gather Tools and Prepare a Clean Workspace
A clean setup prevents re-infection and makes the process faster.
- Sharp pruning shears or scissors
- Isopropyl alcohol or a 10% bleach solution to sterilize tools and pots
- New pot with a drainage hole (not more than 2–4 cm wider than the current root mass after trimming)
- Fresh potting mix suited to your plant (recipes below)
- Paper towels, a small soft brush, and a basin or sink for rinsing roots
- Gloves and a trash bag (discard old soil; don’t compost it)
Cover your work surface with newspaper or a towel. If reusing a pot, scrub it, then disinfect with your bleach solution and rinse well.

Remove, Rinse, and Trim the Roots
Work steadily and gently—damaged roots are fragile.
- Unpot the plant. Support the base and slide the root ball out. Tap the pot sides if it’s stuck. Avoid yanking by the stems.
- Loosen and remove old soil. Use your fingers and a soft brush to tease soil from the roots. Rinse under lukewarm water to reveal the root network.
- Assess the roots. Keep anything firm and pale. Remove anything that is mushy, hollow, or dark brown/black.
- Sterilize, then trim. Wipe blades with alcohol before starting and between cuts on badly affected areas. Cut back to firm, healthy tissue. If a section is entirely rotted, remove it.
- Thin the top growth if necessary. If you removed a lot of roots, prune a few leaves or stems to balance what the smaller root system can support.
- Dispose of waste safely. Bag the old soil and infected roots. Clean the sink or basin and disinfect your tools again.
Skip root soaks or harsh treatments directly on living roots; they can burn delicate tissues. Focus on mechanical removal of rot and cleanliness.
Repot Into a Fresh, Well-Draining Mix
Root rot thrives in compacted, airless soil. Your goal is a mix that drains quickly but still holds just enough moisture for your plant.
Choose a pot with a single large drainage hole. Place a mesh or a shard over the hole to prevent mix loss, not to block drainage. Avoid cachepots without drainage; if you use one, keep the grow pot separate and never let water pool at the bottom.
Suggested mixes (adjust by what you have on hand):
- Aroids (Monstera, Philodendron, Pothos, Syngonium): about 40% high-quality indoor potting soil, 30% medium orchid bark, 20% perlite or pumice, 10% horticultural charcoal or extra bark for airflow.
- Succulents and cacti (Snake plant, ZZ, Haworthia, Echeveria): about 50% cactus/succulent soil, 30% pumice or perlite, 20% coarse sand or fine gravel. Keep organic matter low.
- Ferns and prayer plants (Boston fern, Calathea/Goeppertia, Maranta): about 60% coco coir or peat-based potting soil lightened with 20% perlite and 20% fine bark for air while staying evenly moist.
- Hoya and Peperomia: about 50% potting soil, 30% chunky bark, 20% perlite or pumice for a springy, fast-draining mix.
Potting steps:
- Add a small layer of mix to the pot.
- Center the plant and spread remaining healthy roots outward.
- Backfill, tapping the pot to settle mix into gaps. Don’t bury the crown deeper than before.
- Water lightly to settle the mix until it’s uniformly moist but not dripping. Let excess drain fully.
Aftercare: Watering, Light, and Recovery
Recovery is where many rescues fail. Give roots air, the right amount of water, and steady light.
- Watering in the first 2–3 weeks: Keep the mix slightly on the drier side while new root tips form. Check moisture with your finger; water when the top 2–3 cm are dry for most aroids and leafy tropicals. For succulents, let roughly the top half of the soil dry before watering again.
- Technique: Water slowly and evenly until water exits the drain hole. Empty the saucer within a few minutes. Avoid leaving the pot in standing water.
- Light: Bright, indirect light supports new growth. Avoid harsh midday sun on a weakened plant, but don’t tuck it into a dim corner.
- Temperature and airflow: Keep it warm and away from cold drafts. Gentle airflow helps the surface dry between waterings.
- Fertilizer: Pause feeding for 4–6 weeks. When growth resumes, use a balanced, dilute fertilizer during active growth only.
Build a watering habit that matches your plant and environment. If you’re still dialing it in, this guide can help you set a routine: how often to water houseplants. Setting reminders and logging waterings in Plantico can help you avoid guesswork and track what works.
Prevent Root Rot From Returning
Root rot is less likely when your plant, soil, pot, and watering habit all support oxygen around the roots.
- Right pot, right size: Only size up slightly after a rescue. Too much extra soil holds water your plant can’t use yet.
- Drainage matters: Always use a pot with a drainage hole. If you love decorative cachepots, keep the plastic nursery pot inside and dump any pooled water promptly.
- Match mix to plant: Chunky bark and perlite for climbing aroids, gritty mineral content for succulents, and springy, moisture-retentive but airy blends for ferns and prayer plants.
- Check before you water: Feel the mix, lift the pot to gauge weight, and look at the foliage. Water less in winter or low light, more in warm, bright conditions.
- Water quality: If you see salt crusts on the soil, flush the pot with clean water until it runs freely from the drain hole, then let it drain completely.
- Hygiene: Sterilize used pots and tools. Quarantine new plants briefly and watch for pests that can stress roots.
For plants grown in special media (like orchids in bark or leca), repot on a regular schedule before the medium breaks down and compacts. In orchids, remove blackened roots and repot into fresh bark that lets water run through freely.
Conclusion
Saving a plant from root rot is a straightforward process: confirm the problem, remove diseased roots, repot into a mix with better aeration, then water by the plant’s actual needs instead of the calendar. Most houseplants bounce back once their roots can breathe again. If you’re uncertain about symptoms overlapping with other issues, use a tool to identify plant diseases or confirm the species with a quick identify a plant from a photo check so you can match the soil and watering to the plant. Stay consistent, observe the plant’s response, and let new growth confirm you’re on the right track.