Category: Explainer

  • How to Transition Your Plants from Indoor to Outdoor Environments

    How to Transition Your Plants from Indoor to Outdoor Environments

    How to Transition Your Plants from Indoor to Outdoor Environments: Expert Tips for Success

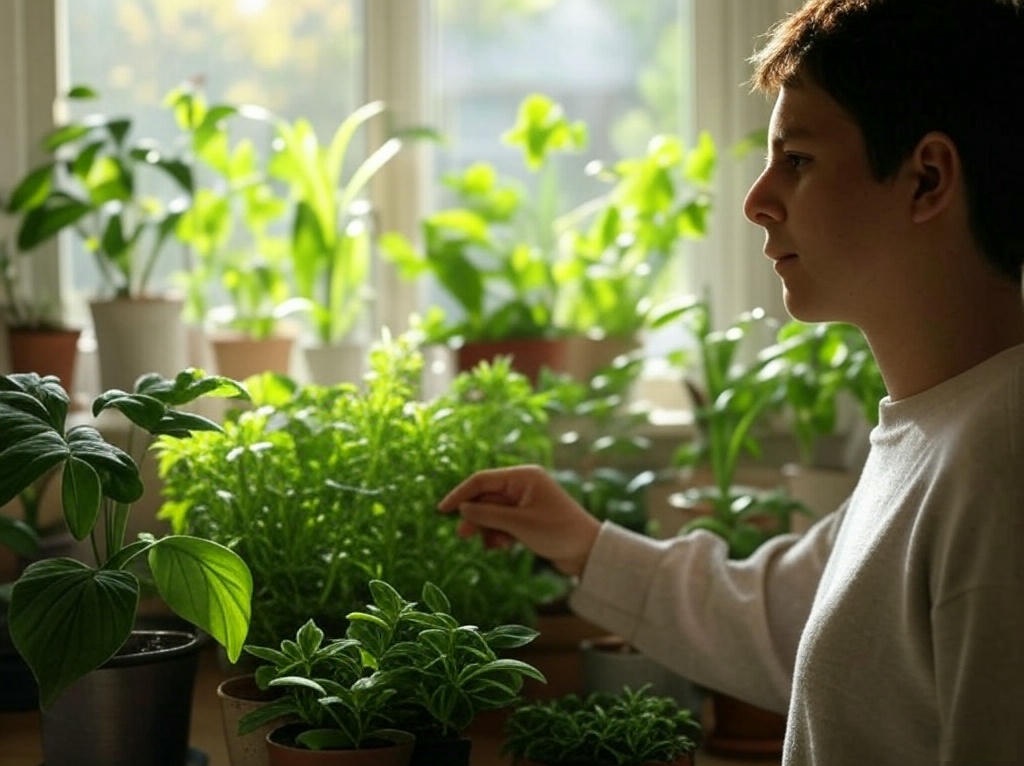
    Moving your indoor plants outside is an exciting step, but it can also be tricky. Plants that have spent months in a controlled indoor environment need careful acclimatization to survive and thrive outdoors. Here are some expert tips that go beyond the basics to ensure your plants make a smooth transition and flourish in their new environment.

    1. Check Plant-Specific Temperature Tolerance

    While many plants can handle warmer weather, not all are suited for sudden outdoor exposure, especially if temperatures fluctuate. Some plants, like tropical varieties, are more sensitive to cold. Use a soil thermometer or monitor your local weather to ensure temperatures are consistently above the plant’s tolerance range. If temperatures drop below 50°F (10°C) at night, consider waiting until it’s warmer or moving them inside temporarily during cooler nights.

    2. Use a “Shading Transition” Method

    A common mistake when transitioning plants is putting them directly in the sun. This can lead to sunburn, especially if they’ve been in low-light indoor environments. To prevent this, place your plants in a shaded area for the first week or two. A good method is to use sheer curtains or a mesh cloth to provide partial shade. Slowly increase their exposure to direct sunlight over the course of several days. This helps your plants gradually build up tolerance without causing damage.

    3. Test the Wind Exposure Gradually

    Wind can be one of the biggest stressors for plants moving outdoors, particularly those that have been indoors, where there’s little air movement. Begin by placing your plants in a sheltered area, such as near a fence, wall, or under a tree. After a week or so, move them to a spot with more wind exposure, increasing their tolerance. This gradual process will prevent wind burn and help your plants strengthen their stems.

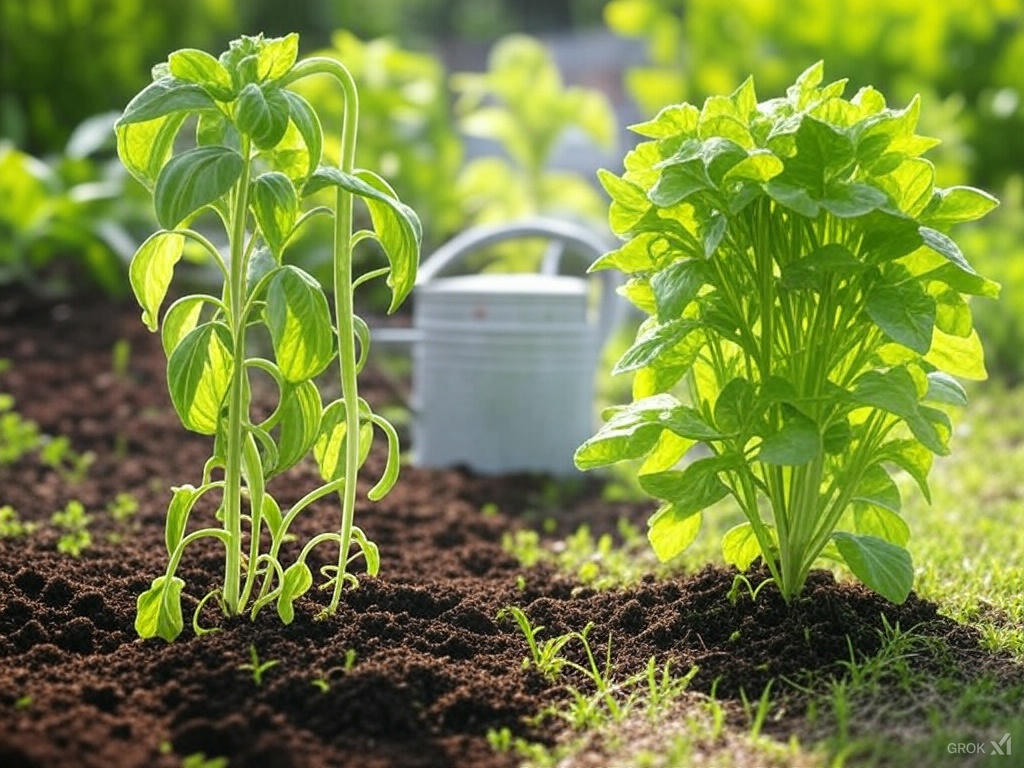
    4. Fertilize Lightly Before the Move

    A little boost of nutrients before moving your plants outside can help them transition successfully. Opt for a balanced, slow-release fertilizer a few weeks before the move. Over-fertilizing right before or after the transition can overwhelm the plants and cause stress. Instead, use a diluted, water-soluble fertilizer once they are outside and settled into their new environment.

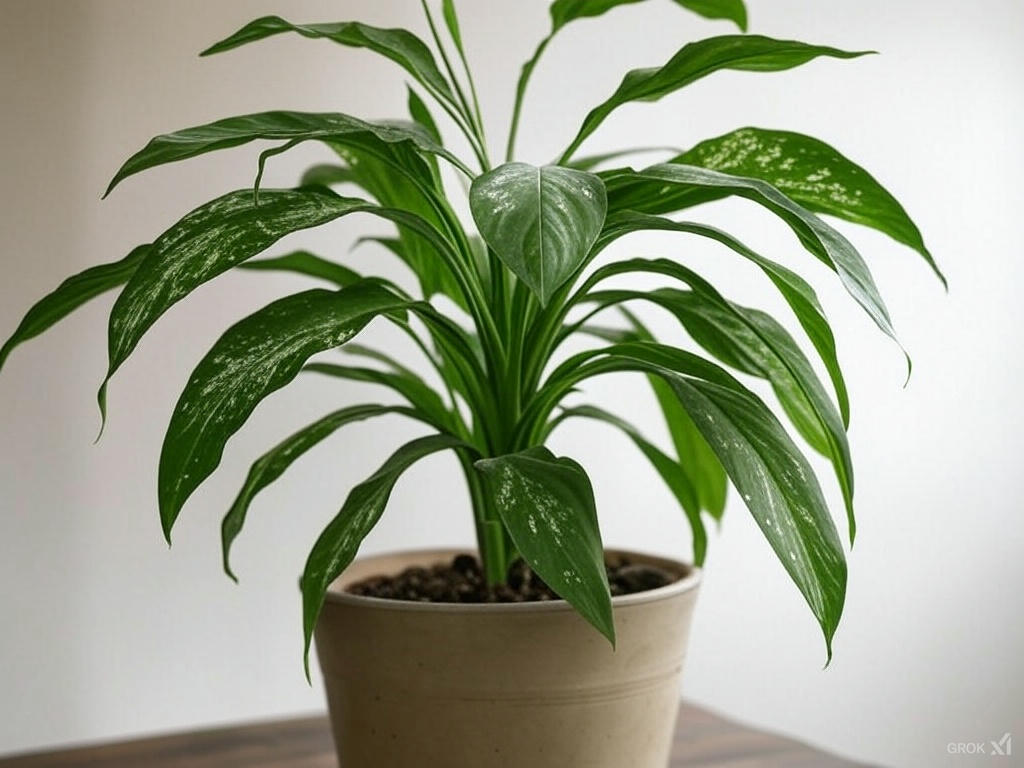
    5. Repot if Necessary

    If your plants have outgrown their pots or their soil has become compacted, now is a good time to repot them. Choose a container that’s large enough to allow room for roots to grow and has proper drainage. Use a mix designed for outdoor plants to provide the right nutrients and drainage. This is especially important for container plants that will be outside for an extended period.

    6. Invest in a Temporary Plant “Greenhouse”

    For an extra layer of protection, consider using a portable mini greenhouse or plant tent during the first few weeks of transition. These setups shield your plants from harsh weather, pests, and temperature extremes. They also create a humid environment that helps plants adjust to their new outdoor habitat, especially useful for tropical plants. Once the plants are acclimated, you can gradually remove the greenhouse.
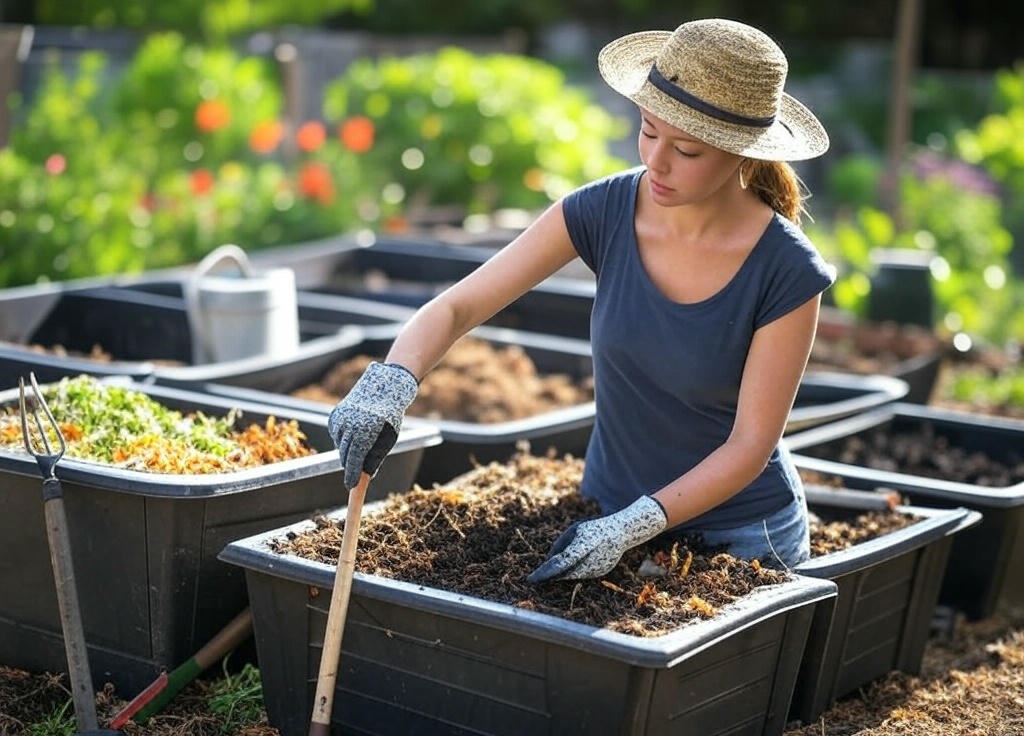
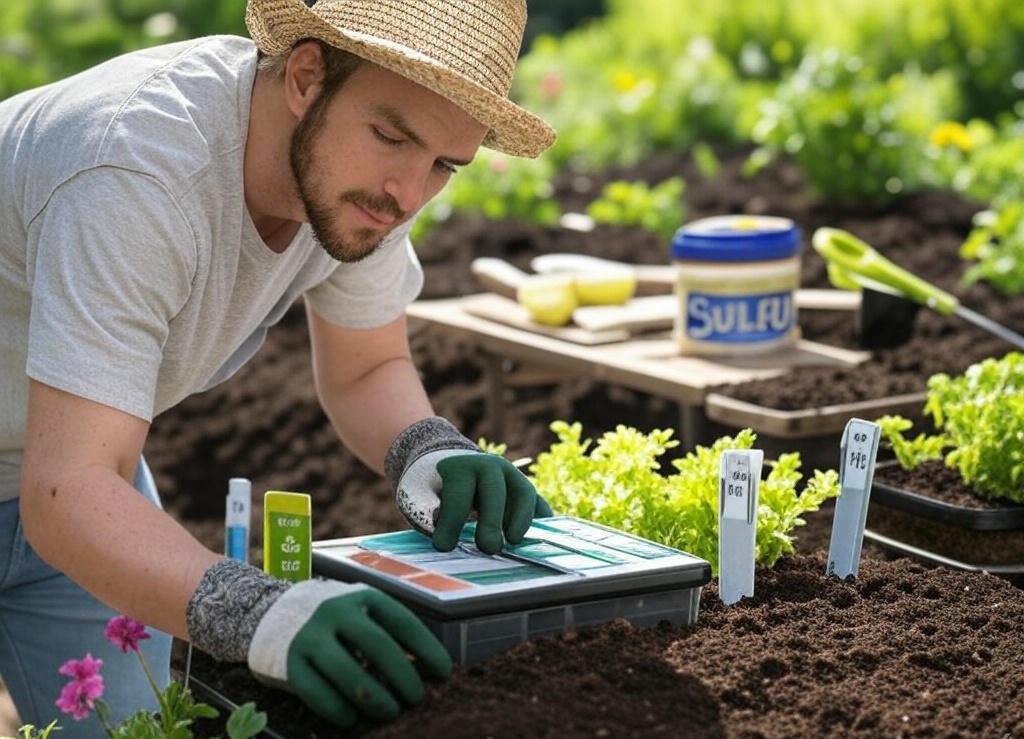
    7. Mind the Soil pH

    Different plants thrive in different soil types. Before planting in the ground, it’s important to check the pH and texture of the soil. Some plants, like azaleas, prefer acidic soil, while others, like lavender, prefer alkaline soil. A simple soil test kit can help you determine the pH and adjust accordingly by adding amendments such as compost or lime to optimize your plants’ growth.

    8. Keep an Eye on Watering Needs

    Plants require different watering amounts based on their environment. Outdoor conditions like wind, heat, and sun exposure can dry the soil out much faster than indoors. After transitioning, check the soil daily and water as needed, but don’t overdo it—root rot is a risk if the soil stays soggy. A good practice is to water deeply once a week, but always check the soil’s moisture before watering again. Adding mulch around the base of your plants can help retain moisture, especially during warmer months.

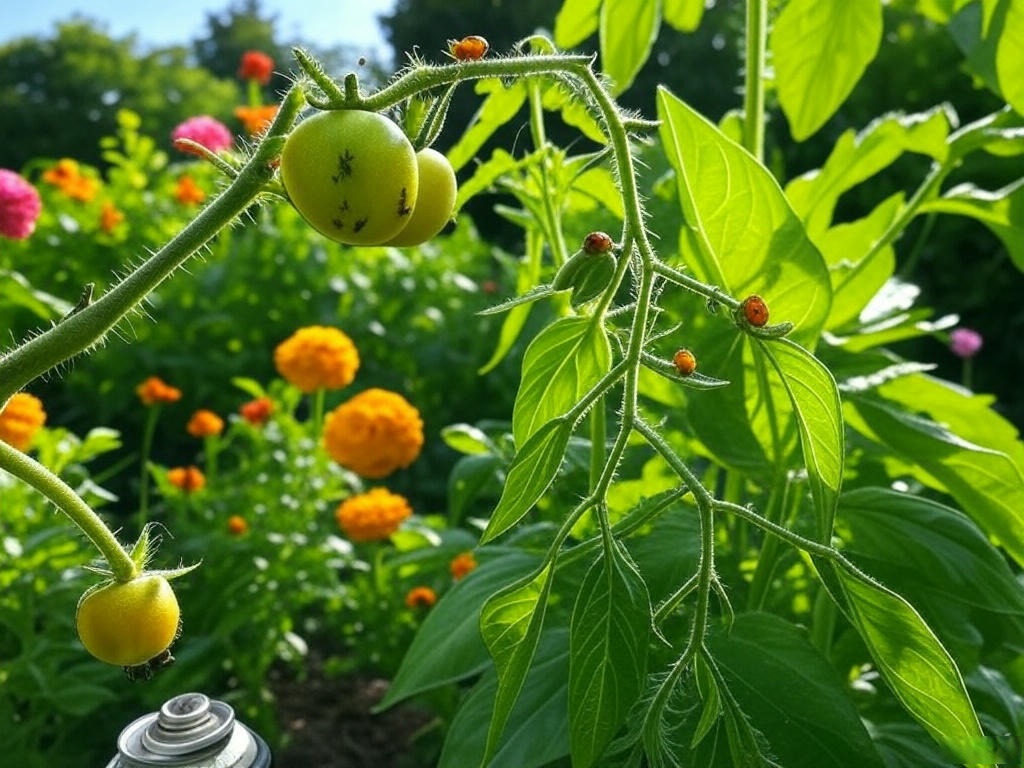
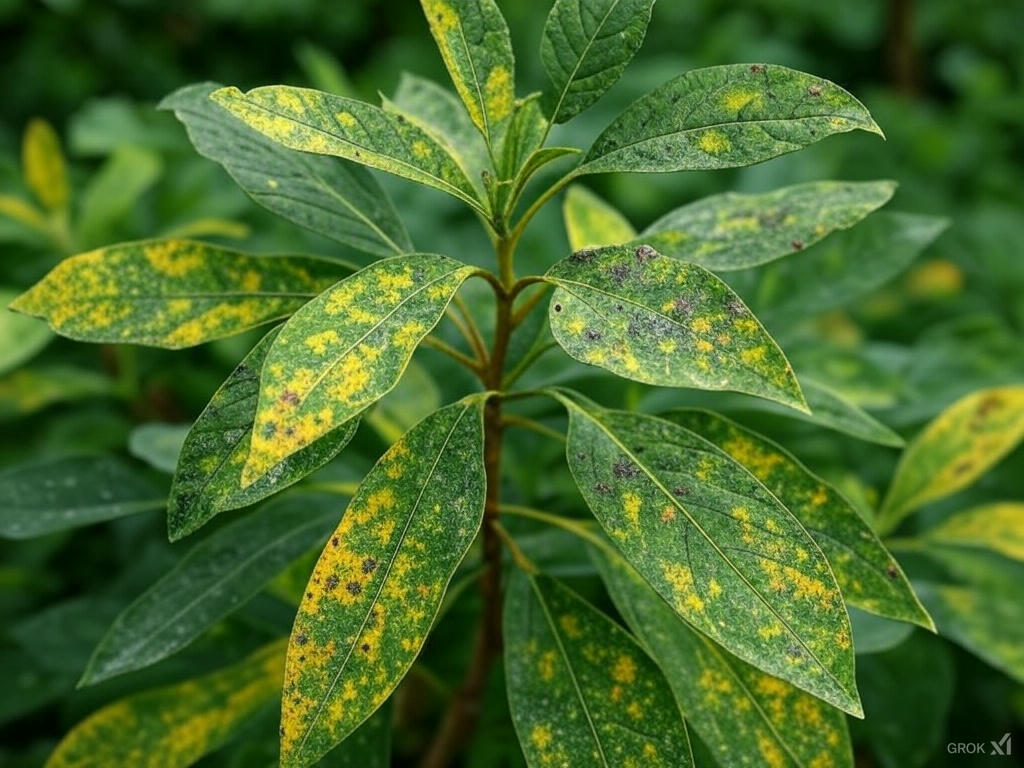
    9. Protect Against Pests Early

    The outdoor world is full of potential threats to your plants. Anticipate pest issues before they arise. Apply an organic insecticidal soap or neem oil to the leaves and stems of your plants about a week after placing them outside. Repeat the treatment every two weeks or after heavy rain. Keep an eye out for common pests like aphids, spider mites, and caterpillars. Remove pests by hand if necessary, especially in the early stages when populations are small.

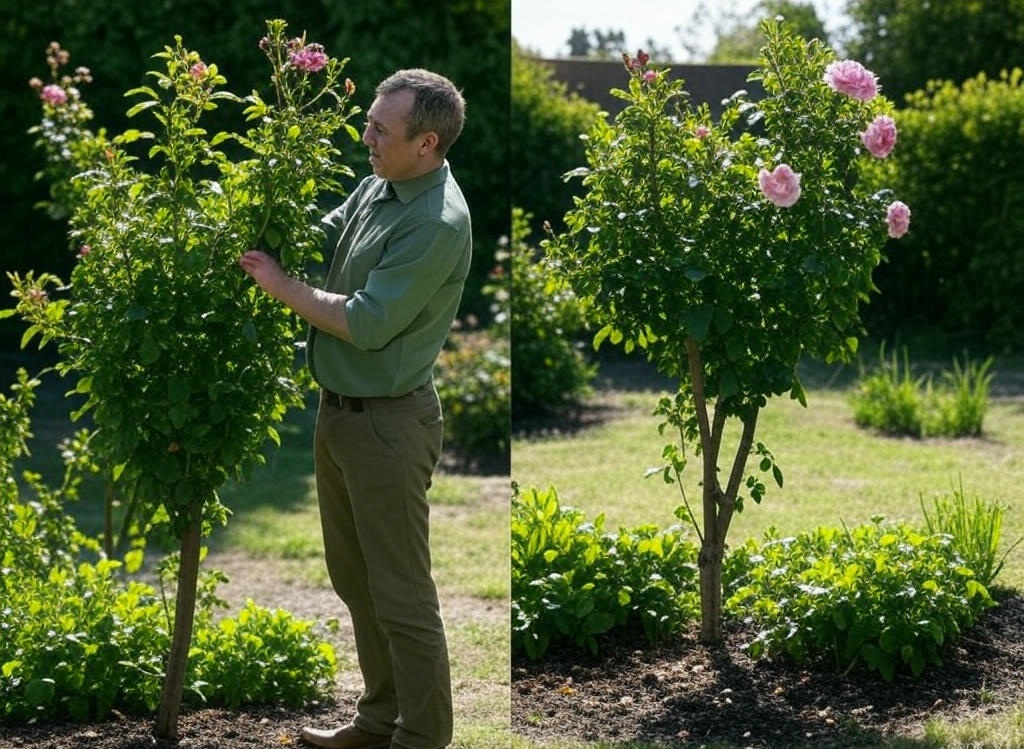
    10. Stay Flexible with Placement

    The environment outside can change rapidly. If your plants start to show signs of stress—such as yellowing leaves, wilting, or burnt tips—don’t hesitate to move them. Sometimes, a plant just needs more or less sunlight, or a better-protected spot from wind. Keep monitoring them closely, especially in the first few weeks, and adjust their placement accordingly.

    11. Acclimate to Rain

    Sudden exposure to rain can be overwhelming for indoor plants, particularly those sensitive to waterlogged roots. When moving your plants outside, check the forecast for any upcoming rainstorms. If rain is expected, move your plants to a sheltered area or temporarily use a tarp to protect them. Gradually, they will adjust and be able to handle rainfall without issue.

  • How to Select Plants Based on Your Home’s Lighting Conditions

    How to Select Plants Based on Your Home’s Lighting Conditions

    How to Select Plants Based on Your Home’s Lighting Conditions

    Plants can transform a space, adding beauty and improving air quality. However, choosing the right plant for your home requires understanding the lighting conditions of each room. Not all plants thrive in the same light, so it’s important to match your plant to its environment. Here’s a simple guide to help you select plants based on your home’s lighting conditions.

    1. Understand the Different Types of Light

    Before selecting plants, it’s important to know the three basic types of light in your home:

    • Bright, Direct Light: This occurs when sunlight directly hits a plant. Rooms with windows that face the sun (usually south or west-facing) provide bright, direct light.
    • Bright, Indirect Light: This is when the light comes through a window but is diffused or blocked by a curtain. It’s still bright but doesn’t shine directly on the plant.
    • Low Light: This occurs in areas away from windows or rooms that receive little natural light, such as hallways or corners.

    2. Choosing Plants for Bright, Direct Light

    For areas with bright, direct light, you’ll want plants that can handle the intensity of the sun without burning or wilting. These plants love sunlight and will thrive in sunny spots.

    • Succulents and Cacti: These plants are perfect for sun-drenched spots. Their thick leaves store water, allowing them to thrive in hot, bright conditions.
    • Fiddle Leaf Fig: A popular choice for bright spaces, it thrives in direct light and adds a dramatic, tropical touch.
    • Aloe Vera: Known for its healing properties, Aloe Vera loves direct sunlight and requires little maintenance.

    3. Choosing Plants for Bright, Indirect Light

    If you have a room with plenty of light, but it’s not directly shining on the plants, you need plants that can adapt to softer, diffused sunlight.

    • Spider Plant: This low-maintenance plant is great in indirect light and can tolerate a variety of conditions.
    • Pothos: Known for its trailing vines, Pothos thrives in indirect light and is perfect for hanging baskets or shelves.
    • Peace Lily: This beautiful plant does well in bright, indirect light and also helps purify the air.

    4. Choosing Plants for Low Light

    For rooms with little natural light, you’ll need plants that can survive with minimal sunlight. These plants are well-adapted to lower light conditions and can still grow beautifully in dimly lit rooms.

    • Snake Plant: Also known as “Mother-in-law’s Tongue,” this plant is very adaptable and can grow in almost any light, including low light.
    • ZZ Plant: The ZZ plant is an excellent choice for low-light conditions. It’s tolerant of neglect and thrives even with minimal sunlight.
    • Philodendron: This plant is perfect for dim spaces, with its heart-shaped leaves adding a touch of greenery without requiring much light.

    5. Observe and Adjust

    Once you’ve selected your plants, it’s important to observe how they’re doing. If you notice that a plant is struggling—leaves turning yellow, wilting, or growing in one direction—it may need more or less light. Feel free to adjust its placement to find the best spot.

  • How to Deal with Common Plant Pests Naturally

    How to Deal with Common Plant Pests Naturally

    Plant pests can cause damage to your garden, from eating leaves to spreading disease. While chemical pesticides are an option, they can harm beneficial insects and the environment. Thankfully, there are many natural ways to manage plant pests and keep your garden healthy without resorting to harsh chemicals. Here are some tips on how to deal with common plant pests naturally.

    1. Know Your Pests

    Before you start combating pests, it’s essential to identify them. Common plant pests include:

    • Aphids: Small, soft-bodied insects that suck sap from plants, causing yellowing and curling of leaves.
    • Spider Mites: Tiny arachnids that create webs on the undersides of leaves and cause stippling or discoloration.
    • Whiteflies: Small, flying insects that feed on plant sap, leading to yellowing leaves and stunted growth.
    • Slugs and Snails: These pests leave slimy trails and feed on tender leaves, causing holes and damage.
    • Caterpillars: Larvae of butterflies and moths that chew through leaves and flowers.

    2. Encourage Beneficial Insects

    Many natural predators feed on plant pests. Attracting these beneficial insects to your garden is one of the best ways to keep pests under control.

    • Ladybugs: These beetles are voracious aphid eaters. You can buy ladybugs from garden centers or plant flowers like dill, fennel, and yarrow to attract them.
    • Lacewings: Lacewing larvae feed on aphids, whiteflies, and other pests. Planting a variety of flowering herbs like cilantro or dill can attract lacewings.
    • Predatory Beetles: These beetles hunt down pests like slugs, aphids, and caterpillars. Planting cover crops like clover can encourage them to stay.

    3. Neem Oil

    Neem oil is a natural pesticide that comes from the neem tree. It works as an insect repellent and disrupts the feeding and reproductive systems of many pests. Neem oil is safe for most plants and does not harm beneficial insects like bees when applied correctly.

    • How to Use: Mix 1-2 tablespoons of neem oil with water and a few drops of mild liquid soap. Spray the solution on the affected plants, focusing on the undersides of the leaves, where pests often hide. Apply in the early morning or late evening to avoid harming pollinators.

    4. Diatomaceous Earth

    Diatomaceous earth (DE) is a powdery substance made from fossilized algae. It works by dehydrating pests like slugs, snails, and aphids by scraping their exoskeletons. DE is safe for humans, pets, and beneficial insects, but it should be applied dry and reapplied after rain.

    • How to Use: Lightly dust the surface of the soil or affected plants with diatomaceous earth. Be sure to wear a mask to avoid inhaling the fine powder.

    5. Soap Spray

    Insecticidal soap is a natural pesticide made from plant-based oils and fatty acids. It’s effective against aphids, whiteflies, and spider mites. The soap works by suffocating the pests without harming your plants.

    • How to Use: You can buy insecticidal soap or make your own by mixing 2 tablespoons of mild liquid soap with 1 quart of water. Spray it directly on the pests, covering both the top and bottom of leaves. Reapply as needed, especially after rain.

    6. Garlic and Chili Spray

    Garlic and chili are natural deterrents for many pests. The strong smells of garlic and the heat from chili peppers repel insects and make your garden less appealing to them.

    • How to Use: Blend 2-3 cloves of garlic with 1-2 hot chilies, a tablespoon of vegetable oil, and a cup of water. Strain the mixture and add a few drops of liquid soap. Spray this solution on your plants to deter pests. Be cautious with the chili mix—avoid getting it in your eyes or on your skin.

    7. Companion Planting

    Companion planting involves growing plants together that either repel pests or attract beneficial insects. For example:

    • Marigolds: These flowers repel aphids, nematodes, and whiteflies. Planting them near your vegetables can help protect them from pests.
    • Basil: Basil repels mosquitoes and flies, making it a great companion for tomatoes.
    • Chives: Chives help repel aphids, Japanese beetles, and slugs, making them an excellent companion for roses and carrots.

    8. Hand-Picking and Trapping

    For some pests, the best solution is simply removing them by hand. You can pick off visible pests like caterpillars, beetles, or aphids and drop them into a bucket of soapy water. For pests like slugs, you can set up traps to catch them.

    • Slug Traps: Place shallow dishes filled with beer or a mixture of sugar water and yeast around your plants. Slugs are attracted to the smell and will crawl in but won’t be able to get out.

    9. Proper Watering and Plant Care

    Healthy plants are less likely to be attacked by pests. Ensure your plants are properly watered and well-nourished to boost their resilience. Avoid overwatering, which can attract pests like aphids and spider mites. Additionally, clear any debris or dead plant material from your garden, as these can harbor pests.

    10. Mulching

    Mulch acts as a barrier, helping to prevent pests like slugs and snails from reaching your plants. It also helps to retain moisture and regulate soil temperature.

    • How to Use: Apply a layer of organic mulch, such as straw, wood chips, or leaves, around your plants. Keep the mulch a few inches away from the plant stems to prevent rot.

    Final Tip

    Dealing with plant pests naturally is all about creating a balanced, healthy environment in your garden. By using beneficial insects, natural pesticides, and other eco-friendly methods, you can protect your plants without harming the environment. Consistency is key—check your garden regularly, apply natural remedies as needed, and your plants will thrive naturally.

  • How to Create a DIY Compost System

    How to Create a DIY Compost System

    Composting is an easy, sustainable way to recycle organic waste and create rich, nutrient-packed soil for your garden. By turning kitchen scraps and yard waste into compost, you can reduce landfill waste and improve soil health. Here’s how to create a DIY compost system that’s simple and effective.

    Why Composting is Important

    Composting benefits the environment by:

    • Reducing Waste: Diverting organic waste from landfills helps reduce the amount of trash that decomposes in a landfill, creating harmful methane gases.
    • Improving Soil Health: Compost enriches the soil by adding essential nutrients, improving drainage, and increasing water retention.
    • Supporting Plant Growth: The nutrients in compost feed plants and encourage strong, healthy growth.

    What You’ll Need

    1. Compost Bin: You’ll need a container or bin to hold your compost. There are several options for DIY compost bins, depending on your space and preference:
      • Wooden Box: Build a simple frame with wooden pallets or scrap wood to create a compost bin. Make sure the bin is open on the sides for air circulation.
      • Plastic or Metal Bin: Use a plastic storage container or a metal trash bin with holes drilled for ventilation.
      • Compost Pile: If you have plenty of space, you can start a compost pile directly on the ground, though this option is less contained and can attract pests.
    2. Aeration Tools: Oxygen is essential for the composting process. A garden fork, shovel, or compost turner will help you mix the compost regularly, ensuring air reaches all parts of the pile.
    3. Moisture: You’ll need a water source to keep the compost moist, but not soaking wet. A garden hose, watering can, or spray bottle will work fine.
    4. Organic Materials: These are the key ingredients for composting. You’ll need a mix of:
      • Greens (Nitrogen-Rich Materials): These include food scraps like vegetable peels, coffee grounds, grass clippings, and fresh plant trimmings. Greens are rich in nitrogen, which helps microbes break down the material.
      • Browns (Carbon-Rich Materials): These include dried leaves, straw, cardboard, wood chips, and newspaper. Browns help balance moisture and provide carbon, which fuels the microorganisms in the compost pile.

    Steps to Create a DIY Compost System

    1. Choose a Location Select a location for your compost bin or pile that’s well-ventilated and away from direct sunlight. A spot in the shade will help keep the compost from drying out too quickly, while still allowing for airflow.
    2. Start with a Layer of Browns Begin by placing a layer of browns (like dry leaves or straw) at the bottom of your bin or pile. This layer helps with drainage and provides a base for air to circulate.
    3. Add Greens Add a layer of greens, such as vegetable scraps or fresh grass clippings. Aim for a balance of 1 part green to 3 parts brown material. A good rule of thumb is to mix the materials as you go, so that the pile remains balanced.
    4. Alternate Layers Continue layering greens and browns, ensuring that each layer is about 3–4 inches thick. Keep alternating layers as you add more material over time. This layering process helps maintain the right carbon-to-nitrogen ratio and allows the compost to break down efficiently.
    5. Moisten the Pile Make sure your compost pile stays moist, similar to a wrung-out sponge. If it starts to dry out, add water. If it’s too wet, add more dry materials like leaves or shredded cardboard to absorb the excess moisture.
    6. Turn the Compost Regularly Turn your compost every few weeks to mix up the materials and allow air to circulate. Aeration speeds up the decomposition process and helps prevent odors. Use a garden fork, shovel, or compost turner to mix the pile thoroughly.
    7. Monitor Temperature and Moisture A healthy compost pile will generate heat as it breaks down. If it feels cool or isn’t decomposing quickly, try turning it more often or adding more green material. If it’s too hot or has a strong odor, it may need more brown material or better aeration.
    8. Wait for Compost to Mature Over time, the compost will break down into dark, crumbly material that smells earthy. This process can take anywhere from a few months to a year, depending on the size of the pile and how often it is turned. You’ll know the compost is ready when it looks like rich, dark soil and no longer resembles the original materials.

    How to Use Your Finished Compost

    Once your compost is ready, you can use it in several ways:

    • Soil Amendment: Mix compost into your garden soil to improve texture, fertility, and moisture retention.
    • Mulch: Spread compost around your plants to help retain moisture, suppress weeds, and add nutrients.
    • Potting Mix: Add compost to potting soil for indoor plants to provide extra nutrients.

    Final Tip

    Composting is a simple, effective way to recycle organic waste and create nutrient-rich soil for your garden. By starting a DIY compost system, you’ll reduce waste, improve your soil, and grow healthier plants. Remember to balance greens and browns, keep your pile moist, and turn it regularly for the best results. Happy composting!

  • How to Attract Beneficial Insects to Your Garden

    How to Attract Beneficial Insects to Your Garden

    Beneficial insects are nature’s little helpers, keeping pests in check and promoting a healthy, balanced garden ecosystem. By attracting these beneficial insects, you can reduce the need for chemical pesticides and encourage a thriving, sustainable garden. Here’s how you can attract beneficial insects to your garden.

    Why Beneficial Insects are Important

    Beneficial insects play a key role in:

    • Pollination: Insects like bees and butterflies help pollinate flowers, leading to better fruit and vegetable production.
    • Natural Pest Control: Predators like ladybugs, lacewings, and predatory beetles consume harmful pests such as aphids, caterpillars, and spider mites.
    • Soil Health: Certain insects, like earthworms, aerate the soil and break down organic matter, improving soil health and structure.

    Types of Beneficial Insects

    Here are a few beneficial insects to attract:

    • Ladybugs: These voracious predators feast on aphids and other soft-bodied pests, helping to keep pest populations under control.
    • Bees: Bees are essential pollinators for most plants, particularly fruits and vegetables.
    • Lacewings: Lacewing larvae are great at hunting aphids, thrips, and whiteflies.
    • Predatory Beetles: These beetles consume pests like slugs, caterpillars, and other harmful insects.
    • Butterflies: Not only do butterflies add beauty to your garden, but their larvae feed on certain garden pests, keeping the population in check.

    How to Attract Beneficial Insects

    1. Plant Pollinator-Friendly Flowers Planting a variety of flowering plants will attract pollinators like bees and butterflies. Choose plants that bloom at different times of the year, so there’s always a food source for these insects. Good options include sunflowers, lavender, marigolds, daisies, and coneflowers. Native plants are particularly attractive to local insect species.
    2. Grow Nectar-Rich Plants Insects like ladybugs, lacewings, and other predators are also attracted to plants that offer nectar. Some great nectar-rich flowers to consider are thyme, fennel, dill, and cosmos. These plants attract beneficial insects looking for both food and habitat.
    3. Provide Shelter and Habitat Beneficial insects need shelter to hide from predators and bad weather. You can encourage beneficial insects to take up residence by:
      • Planting Dense Foliage: Shrubs and tall flowers provide cover.
      • Creating Insect Hotels: Consider installing an insect hotel made of twigs, bamboo, and hollow stems to attract solitary bees and other insects.
      • Leaving Deadwood: Dead logs and plant material provide habitats for beetles and other beneficial species.
    4. Avoid Harmful Pesticides Many pesticides not only harm pests but also beneficial insects. To avoid killing helpful species, use organic methods for pest control or choose pesticides that are safe for beneficial insects. Insecticidal soap or neem oil are safer options when pest problems arise.
    5. Use Companion Planting Companion planting involves growing certain plants together to naturally repel pests or attract beneficial insects. For example, planting marigolds near tomatoes can repel aphids and attract ladybugs. Similarly, basil and lavender can draw pollinators while keeping away pests like mosquitoes.
    6. Provide Water Sources Beneficial insects need water to drink and bathe. Adding a shallow birdbath, small pond, or water dish can help keep them hydrated. Ensure the water is shallow and has rocks or sticks for insects to land on safely.

    Final Tip

    Creating a garden that attracts beneficial insects is about providing the right environment—food, shelter, and water—while minimizing the use of harmful chemicals. With a little planning, you can build a garden that supports these helpful insects and enhances your garden’s health and productivity. So, roll out the welcome mat for these tiny helpers, and watch your garden thrive!

  • How to Understand and Improve Your Soil’s pH Level

    How to Understand and Improve Your Soil’s pH Level

    Soil pH plays a vital role in how well your plants grow. The pH level of your soil affects how nutrients are absorbed by plant roots, and different plants thrive in different pH ranges. Understanding and adjusting your soil’s pH is essential for healthy, thriving plants. Here’s a guide to help you understand soil pH and how to improve it for optimal growth.

    What is Soil pH?

    Soil pH refers to the acidity or alkalinity of the soil. It’s measured on a scale from 0 to 14:

    • pH 7 is neutral (neither acidic nor alkaline).
    • Below pH 7 indicates acidic soil.
    • Above pH 7 indicates alkaline soil.

    Most plants prefer soil that’s slightly acidic to neutral, with a pH between 6.0 and 7.0. However, some plants, such as blueberries, prefer more acidic soil, while others, like lavender, thrive in alkaline conditions.

    Why is Soil pH Important?

    Soil pH affects:

    1. Nutrient Availability: The pH of your soil determines how well your plants can absorb essential nutrients. For instance, if the soil is too acidic or too alkaline, plants may not be able to access nutrients like nitrogen, phosphorus, and potassium, leading to poor growth.
    2. Soil Microorganisms: Different pH levels support different populations of soil microbes. These microorganisms help break down organic material and enhance nutrient availability. Some beneficial microbes thrive in acidic soils, while others prefer neutral or alkaline conditions.
    3. Plant Health: Certain plants are sensitive to soil pH. For instance, azaleas, camellias, and rhododendrons prefer acidic soil, while plants like asparagus and cabbage thrive in alkaline soil.

    How to Test Your Soil’s pH

    Before you can improve your soil’s pH, you need to know what it currently is. Here’s how you can test it:

    1. Use a Soil Test Kit: You can purchase a soil pH test kit from a garden center or online. These kits usually involve mixing a soil sample with a testing solution or indicator, which will show the pH on a color chart.
    2. Send Soil to a Lab: For a more detailed and accurate test, you can send a soil sample to a local agricultural extension service or private lab. They will provide a comprehensive analysis of your soil, including its pH and nutrient content.
    3. DIY Methods: For a quick, though less precise, test, you can use a baking soda and vinegar test. Mix some soil with water to create a slurry. Add vinegar to the mixture; if it fizzes, the soil is alkaline. If you add baking soda and it fizzes, the soil is acidic.

    How to Improve Your Soil’s pH

    Once you know your soil’s pH, you can take steps to adjust it to the ideal range for your plants. Here are some common ways to modify soil pH:

    1. To Lower Soil pH (Make It More Acidic)

    If your soil is too alkaline and you need to lower its pH, here are some methods:

    • Add Organic Matter: Incorporating organic matter like compost or mulch can naturally lower pH over time. Organic materials release humic acids as they decompose, which helps acidify the soil.
    • Use Elemental Sulfur: This is one of the most effective ways to lower soil pH. Microorganisms in the soil convert sulfur into sulfuric acid, which lowers the pH. Follow the instructions on the sulfur packaging for the right amount to use.
    • Add Peat Moss: Peat moss is naturally acidic and can be added to soil to help reduce pH. It also improves soil structure and water retention.
    • Use Pine Needles: Pine needles have an acidic nature, and adding them to your soil can help lower the pH. They also improve soil texture and drainage.

    2. To Raise Soil pH (Make It More Alkaline)

    If your soil is too acidic and you want to raise its pH, you can:

    • Add Lime: Ground limestone (calcium carbonate) is commonly used to raise soil pH. It reacts with the soil’s acidity to neutralize it. Dolomitic lime is an alternative, which also adds magnesium to the soil.
    • Wood Ash: Wood ash from a fireplace or garden bonfire is alkaline and can help raise soil pH. It also provides potassium and trace minerals to the soil.
    • Bone Meal: This is an organic alternative that helps raise pH while also adding phosphorus, which promotes root growth and flowering.
    • Compost and Manure: While compost is more commonly used to improve soil structure and fertility, compost made from materials like lime or high-calcium compost can also help raise soil pH.

    Best Practices for Soil pH Management

    1. Make Changes Gradually: When adjusting your soil’s pH, do so slowly. Drastic changes can harm plant roots. Make small adjustments over time and retest the soil regularly.
    2. Work Amendments Into the Soil: To ensure that pH-adjusting materials like sulfur or lime work effectively, mix them into the soil to a depth of at least 6 inches. This ensures the amendments reach the root zone.
    3. Consider Plant Preferences: Different plants have different pH preferences. Always check the recommended pH range for the plants you’re growing and adjust accordingly.

    When to Adjust Soil pH

    Adjust your soil pH before planting, as it’s easier to modify the soil before your plants take root. However, if your soil pH is off during the growing season, it can still be adjusted, but it might take some time to show results. Be patient, and remember that pH adjustments can take several months to fully affect the soil.

    Final Tip

    Maintaining the correct soil pH is an ongoing process. It’s important to regularly test your soil and make adjustments as necessary. By understanding and managing your soil’s pH, you can create an optimal environment for plant growth, ensuring they have the nutrients they need to flourish.

  • How to Prune Your Plants for Optimal Growth

    How to Prune Your Plants for Optimal Growth

    Pruning is one of the best ways to ensure your plants grow healthy, strong, and full of vibrant blooms. It may seem like a daunting task, but with the right approach, pruning can make a huge difference in the overall health and appearance of your plants. Here’s how to prune your plants for optimal growth.

    Why Pruning is Important

    Pruning is essential for a few reasons:

    • Encourages Healthy Growth: By removing dead or damaged branches, you allow the plant to direct its energy toward new, healthy growth.
    • Improves Air Circulation: Pruning helps maintain good airflow through the plant, reducing the risk of diseases and pests.
    • Promotes Flowering and Fruiting: Many plants need to be pruned to encourage more blooms or fruit. Proper pruning allows sunlight and nutrients to reach the right parts of the plant.
    • Controls Size and Shape: Regular pruning keeps your plant’s size in check and helps maintain a neat, attractive shape.

    When to Prune

    The timing of your pruning is crucial:

    • Late Winter or Early Spring: Most plants benefit from pruning before the growing season begins, while they are still dormant. This gives the plant time to heal and start growing fresh new growth in the spring.
    • After Flowering: For flowering plants, prune after they have finished blooming. Pruning them too early can remove buds and prevent flowers from developing.
    • During the Growing Season: Light pruning can be done during the growing season to remove dead or diseased growth and maintain shape, but avoid heavy pruning, as this can stress the plant.

    Tools You’ll Need

    Having the right tools makes pruning much easier and more effective:

    • Pruning Shears: These are perfect for small to medium-sized stems and branches.
    • Loppers: Larger loppers are useful for thicker branches that shears can’t handle.
    • Saws: For very thick or old wood, a pruning saw can help get the job done without damaging the plant.
    • Gloves: Protective gloves are a must, especially when handling thorny plants or plants with irritants.

    How to Prune Your Plants

    1. Remove Dead or Diseased Growth
      Start by cutting away any dead, diseased, or damaged branches. These can attract pests and diseases, so removing them helps keep the plant healthy. Make clean cuts near the base of the branch or just above the node (where a leaf or bud is attached).
    2. Cut Back Leggy or Overgrown Branches
      If your plant is becoming leggy (too long and spindly) or overgrown, prune the stems back to a healthy, strong node. This encourages new, bushier growth. For woody plants, cutting just above a node will stimulate growth in that area.
    3. Thin Out Overcrowded Areas
      When a plant’s branches are crowded, it’s important to thin them out. Cut some branches back to the base to improve air circulation and allow light to reach the inner parts of the plant. This is especially important for plants prone to fungal issues.
    4. Shape the Plant
      To keep your plant looking neat, prune to shape it. For shrubs and bushes, remove any uneven or stray branches to create a balanced look. For trees, remove any crossing or inward-growing branches to ensure the plant has a strong structure.
    5. Encourage Flowering and Fruiting
      Some plants, like roses or fruit trees, need specific pruning to encourage flowering or fruiting. For roses, cutting back to a healthy bud can stimulate new blooms. For fruit trees, prune the central branches to create an open structure that allows sunlight to reach the fruit-bearing parts of the plant.

    Pruning Different Types of Plants

    1. Flowering Plants
      Prune flowering plants like hydrangeas and roses after they’ve bloomed. For hydrangeas, cut back the spent flowers and trim the plant to shape, removing any dead wood. For roses, prune back the stems after flowering to encourage new growth and more blooms.
    2. Shrubs and Bushes
      Shrubs should be pruned to maintain their shape and remove dead wood. For dense shrubs, thin out the center to improve airflow. Always prune just above a node to encourage new growth.
    3. Trees
      Prune trees in late winter or early spring before the sap starts flowing. Remove any weak, crossing, or diseased branches. For fruit trees, focus on cutting back old wood to encourage new growth that will produce more fruit.
    4. Indoor Plants
      Indoor plants like ivy or pothos can benefit from pruning to keep them from becoming leggy. Trim back the vines to promote fuller, bushier growth. For flowering indoor plants, remove spent blooms to encourage new flowers.

    Pruning Mistakes to Avoid

    • Don’t Cut Too Much: Pruning too aggressively can stress your plant. Always prune in moderation and remove no more than a third of the plant at once.
    • Avoid Cutting into Old Wood on Some Plants: For some plants, like azaleas or camellias, cutting into old wood can prevent new blooms from forming. Be sure to know the specific needs of the plant you’re pruning.
    • Use Sharp Tools: Dull pruning tools can tear the plant tissue, leading to damage. Make sure your tools are sharp to make clean cuts.

    Final Tip

    Pruning might seem intimidating at first, but with the right tools and knowledge, it’s an easy and rewarding task. Regular pruning not only keeps your plants looking great but also helps them grow stronger and healthier. Remember to always research specific plants to understand their pruning needs, and your plants will thank you with lush growth and vibrant flowers!

  • How to Choose the Right Fertilizer for Your Plants

    How to Choose the Right Fertilizer for Your Plants

    Fertilizing your plants is essential for their health and growth, but choosing the right fertilizer can sometimes feel overwhelming. With so many options available, it’s important to understand the basics of fertilizers to make the best choice for your plants. Here’s a simple guide to help you pick the right fertilizer and give your plants the nutrients they need to thrive.

    Understanding Fertilizer Labels

    Fertilizers are often labeled with three key numbers that represent the NPK ratio: Nitrogen (N), Phosphorus (P), and Potassium (K). These nutrients are essential for plant growth, and the numbers on the label show the percentage of each nutrient in the product. Here’s what each one does:

    • Nitrogen (N): Helps plants grow lush and green by promoting leaf and stem development. It’s particularly important for leafy vegetables and grass.
    • Phosphorus (P): Supports root development, flowering, and fruiting. It’s crucial for plants that produce flowers or fruits, like tomatoes and peppers.
    • Potassium (K): Strengthens plants, helping them resist diseases, improve drought tolerance, and build strong cell walls. It’s important for overall plant health.

    For example, a fertilizer with an NPK ratio of 10-10-10 contains 10% nitrogen, 10% phosphorus, and 10% potassium.

    Types of Fertilizers

    1. Granular Fertilizers
      These are solid fertilizers that need to be applied to the soil. Granular fertilizers can be slow-release or fast-release, meaning they either provide nutrients over time or immediately boost plant growth. They are great for outdoor plants and larger gardens.
    2. Liquid Fertilizers
      Liquid fertilizers are mixed with water and applied directly to the soil or sprayed onto the leaves. They are absorbed quickly, making them great for fast-acting results, but they may need to be applied more frequently.
    3. Organic Fertilizers
      Made from natural sources like compost, manure, or plant matter, organic fertilizers are gentle on plants and improve soil health over time. They are ideal for organic gardening and provide slow, steady nutrition.
    4. Synthetic Fertilizers
      These are chemically manufactured and provide immediate nutrition to plants. While they can be very effective, synthetic fertilizers may sometimes lead to nutrient imbalances in the soil if overused.

    How to Choose the Right Fertilizer

    1. Know Your Plant’s Needs
      Different plants require different nutrients. For example, leafy greens like lettuce and spinach benefit from a fertilizer higher in nitrogen, while flowering plants or fruiting vegetables need more phosphorus to encourage blooms and fruit. Choose a fertilizer based on the needs of your plants.
    2. Consider the Soil
      Test your soil to check for existing nutrient levels. If your soil is rich in one nutrient but lacking in others, select a fertilizer with a higher percentage of the missing nutrient. For example, if your soil has plenty of nitrogen but lacks phosphorus, choose a fertilizer with a higher phosphorus ratio.
    3. Time of Year
      The time of year can affect the type of fertilizer you choose. In the spring and summer, when plants are actively growing, use fertilizers with higher nitrogen content. In fall or when preparing plants for the winter, use a balanced or higher potassium fertilizer to strengthen roots and help plants resist cold stress.
    4. Slow-Release vs. Fast-Release
      Slow-release fertilizers are ideal for plants that don’t need a lot of immediate nutrients. These are great for long-term plant health, as they provide a steady flow of nutrients over time. Fast-release fertilizers work quickly, making them good for quick growth spurts, such as when transplanting young seedlings or preparing for a harvest.
    5. Water-Soluble vs. Granular
      Water-soluble fertilizers are easy to apply and are often absorbed quickly by the plant. They are perfect for plants that need an instant nutrient boost. Granular fertilizers, on the other hand, break down slowly, making them better for long-term feeding.

    Applying Fertilizer

    1. Follow the Instructions
      Whether using liquid or granular fertilizer, always follow the instructions on the packaging to avoid over-fertilizing. Too much fertilizer can damage plants, burn the roots, or cause excessive growth that weakens the plant.
    2. Fertilize During the Growing Season
      Most plants need fertilizing during their growing season, usually spring and summer. Avoid fertilizing during dormant periods (like winter), as plants won’t absorb nutrients effectively.
    3. Water After Fertilizing
      After applying fertilizer, water your plants well. This helps the nutrients dissolve and get into the root zone, where the plant can absorb them.

    Final Tip

    Remember, plants can’t thrive on fertilizer alone. Healthy soil, proper watering, and good sunlight are essential for plant growth. Fertilizer is just one piece of the puzzle! By understanding your plants’ needs and applying the right fertilizer, you’ll help them grow strong, healthy, and beautiful.

  • How to Identify and Treat Common Plant Diseases

    How to Identify and Treat Common Plant Diseases

    Plants can be vulnerable to a variety of diseases, but with a little knowledge, you can spot symptoms early and take action before they cause serious harm. Here’s how to identify and treat some of the most common plant diseases.

    Common Plant Diseases and Their Symptoms

    1. Leaf Spots
      Leaf spots are a common sign of fungal or bacterial infections. These appear as round or irregular patches on leaves, often yellow, brown, or black in color. The spots might have a yellow halo or appear as water-soaked lesions, especially in the early stages.
    2. Mold (Powdery or Downy Mildew)
      Mold often appears as a white, powdery substance on leaves, stems, or buds. Powdery mildew thrives in dry air with poor circulation, while downy mildew causes yellowing of the leaves with fuzzy white or purple mold on the underside.
    3. Blight
      Blight is a serious plant disease that often starts with yellowing and wilting leaves, followed by blackened, necrotic areas. Infected plants may exhibit rapid decay, especially in wet and humid conditions. Common blights include early and late blight on tomatoes and fire blight on fruit trees.

    How to Treat Plant Diseases

    1. For Leaf Spots
      If your plant has leaf spots, remove and dispose of the affected leaves. Never compost them, as this can spread the disease. Use a fungicide or bactericide, depending on whether the infection is fungal or bacterial. Always follow the instructions on the product for safe and effective use. In some cases, pruning back infected stems can help stop the spread.
    2. For Mold (Powdery and Downy Mildew)
      For powdery mildew, spray your plant with a fungicide that specifically targets mildew, or try a homemade solution of baking soda and water. Be sure to improve air circulation around the plant by thinning out crowded leaves and ensuring the plant is not too moist. For downy mildew, remove the infected leaves and treat with a fungicide recommended for mildew. It’s also important to avoid overhead watering to keep the leaves dry.
    3. For Blight
      Blight can be more difficult to treat, especially once it has progressed. If you notice early signs, remove any infected leaves immediately and dispose of them. For blight on tomatoes, use a copper-based fungicide or a specific blight treatment. Make sure to rotate crops each year to avoid blight buildup in the soil. For fire blight on fruit trees, prune infected branches during the dry season, and disinfect your tools between cuts to prevent spreading the disease.

    Preventive Measures

    1. Proper Watering: Always water at the base of the plant to avoid wetting the leaves. Wet foliage creates an environment for fungal infections. Use drip irrigation if possible to direct water to the roots.
    2. Maintain Plant Spacing: Crowded plants are more likely to develop diseases because they lack good airflow. Make sure plants have enough space to grow and allow for proper air circulation.
    3. Remove Debris: Fallen leaves and plant matter can harbor diseases, so be sure to clean up around your plants regularly, especially in the fall.
    4. Use Resistant Varieties: Some plants are bred to resist common diseases like mildew or blight. When buying plants, look for disease-resistant varieties to minimize the risk of infection.

    When to Consult a Professional

    While most plant diseases can be managed with the right care, some can be tricky to treat or might require stronger interventions. If you’ve tried treating the disease and the plant isn’t improving, or if it’s spreading rapidly, it’s time to consult a professional. A local nursery, extension office, or plant pathologist can help identify the disease and recommend the best course of action.

    Final Tip

    Early detection is key! Keep an eye on your plants, and if you notice any changes in their appearance, take action right away. With the right treatment and preventive care, you can keep your plants healthy and disease-free.

  • How to Revive an Overwatered Plant:

    How to Revive an Overwatered Plant:

    Overwatering is one of the most common mistakes plant owners make, but the good news is that with the right steps, you can revive an overwatered plant. Here’s how to identify the signs and save your plant before it’s too late.

    Signs of Overwatering

    1. Wilting despite moist soil: It might seem counterintuitive, but plants that are overwatered often look wilted. The roots are overwhelmed with too much water, causing them to drown and not take in nutrients properly.
    2. Yellowing leaves: If the leaves of your plant turn yellow and begin to drop, it’s a red flag. Overwatering leads to root rot, which impacts the plant’s ability to take up nutrients, resulting in discolored and weak leaves.
    3. Root rot: If you notice a bad smell coming from the soil or if the roots appear brown and mushy, you’re dealing with root rot. This is often the result of overwatering and poor drainage, and it can be deadly to your plant if not addressed.

    Steps to Revive an Overwatered Plant

    1. Check the roots: Gently remove the plant from its pot. Examine the roots for any signs of rot, such as brown or mushy spots. Trim away the affected roots using clean scissors or pruning shears.
    2. Let the plant dry out: After removing the damaged roots, let the plant sit out of its pot for a few hours or even a day, allowing it to dry out slightly. This helps to reduce excess moisture and gives the remaining healthy roots a chance to recover.
    3. Improve drainage: If your plant’s pot doesn’t have enough drainage holes, now is the time to repot it into a new one with better drainage. This will prevent future waterlogging and ensure that excess water can escape.
    4. Repot the plant: Use fresh, well-draining soil to repot your plant. A mix designed for the specific plant type (e.g., cactus soil for succulents or orchid bark for orchids) will work best. Avoid packing the soil too tightly, as this can restrict root growth.
    5. Adjust your watering schedule: The key to preventing overwatering in the future is understanding the plant’s needs. Different plants require different watering schedules, but as a rule of thumb, it’s better to let the soil dry out a bit before watering again. Use your finger to check the soil—if it feels dry an inch or two below the surface, it’s time to water. Make sure the pot has good drainage, so excess water can escape.
    6. Place in the right environment: Once repotted, place your plant in a location where it can recover—avoid direct sunlight for the first few days, as the plant may be stressed. Ensure it gets indirect light and is kept at a comfortable temperature.

    Final Tip

    If you’re unsure about how often to water, try using a moisture meter or simply check the soil every few days. Remember, underwatering is far less harmful than overwatering, so it’s better to err on the side of caution.

    By following these steps, you can bring your overwatered plant back to life and help it thrive once again!